Build a Flutter App
Flutter app builder is the fastest way to bring your app design to life without weeks of coding. Get everything right here in your app from design to code, to app sync on GitHub or GitLab, along with multiple app features like API integration, in-app Runtime Permissions, Social authentication.
DhiWise converts your design to code by auto-identifying all your screen UI, widgets, and generates complete code for the same. Easily set up actions on your widgets like Navigation, API Integration, Social authentication, and many more to easily generate your complete app in no time!
Project set up
Quick steps to set up your entire Flutter application:
- Create an application: Create a new application using Figma design, or create one from the vast collection of templates or screen library.
- Customize design: Edit and modify widgets and their properties to mitigate design issues before you build your app.
- Change widget: Change or modify the widgets easily, rather than moving back to Figma.
- Set up Actions on widgets: Add actions like Navigation, Social Authentication, Runtime Permissions, and many more on your widgets.
- Add APIs and Environment variables: Add APIs manually or upload a Postman collection and start integrating APIs in your app.
- Manage app life cycle: Set up "onReady" method call and integrate actions to it in a few clicks.
- Build app: Lastly, build your app anytime and own your app source code.
Create an application
Click on New application.
You will have three options to create an application
- Create a new app: Create an application from scratch by importing your app design from Figma.
- Create from templates: In case you do not have an app design file, create an application from the wide range of built-in templates based on various categories.
- Create from screen library: Pick screens of your choice based on a category and create an application from 500+ screens provided by DhiWise.
Create a new app
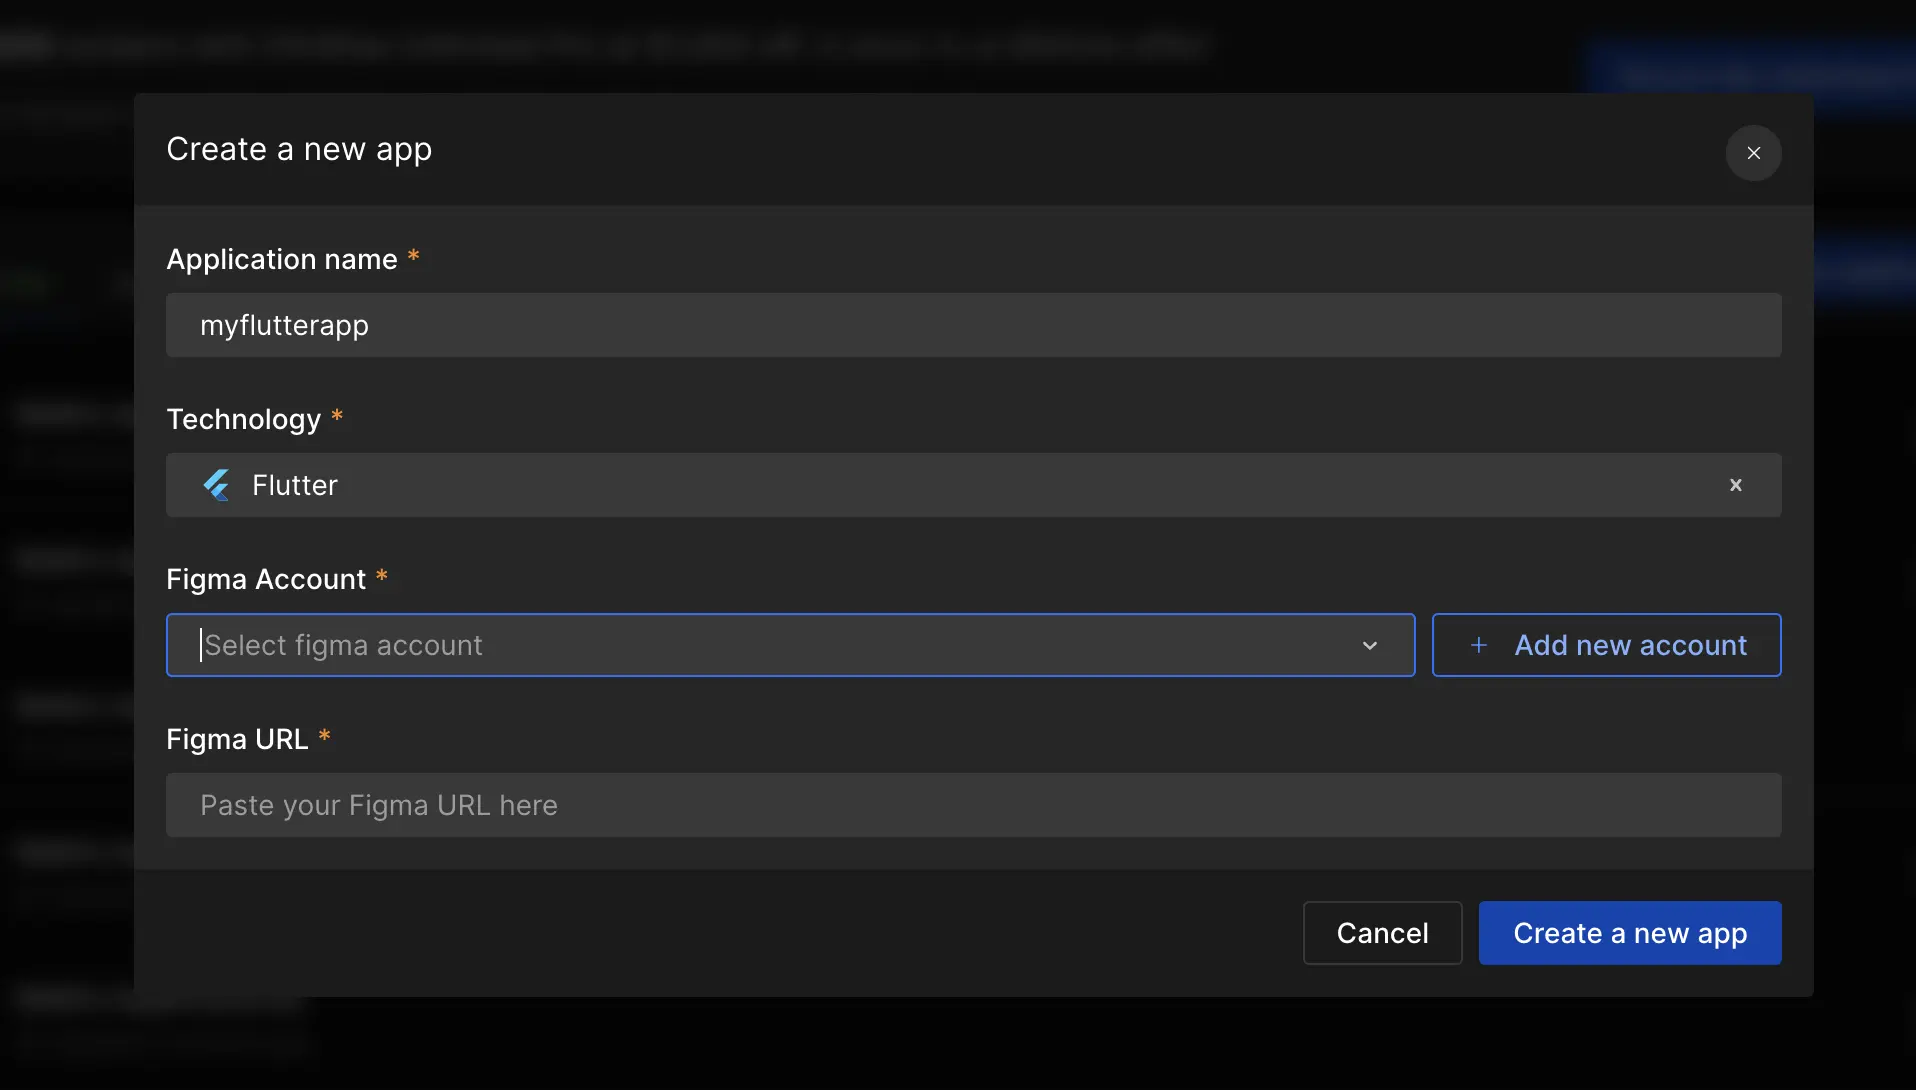
Step 1: Give app a name, choose technology as Flutter
Select platform as Mobile to create a Flutter app. Next, enter your Application name and select Technology from the drop-down as Flutter.
Step 2: Select Figma account and paste Figma URL
Click on Add new account to link your Figma account with DhiWise. Paste the Figma file URL of your app design, and click on Create a new app.
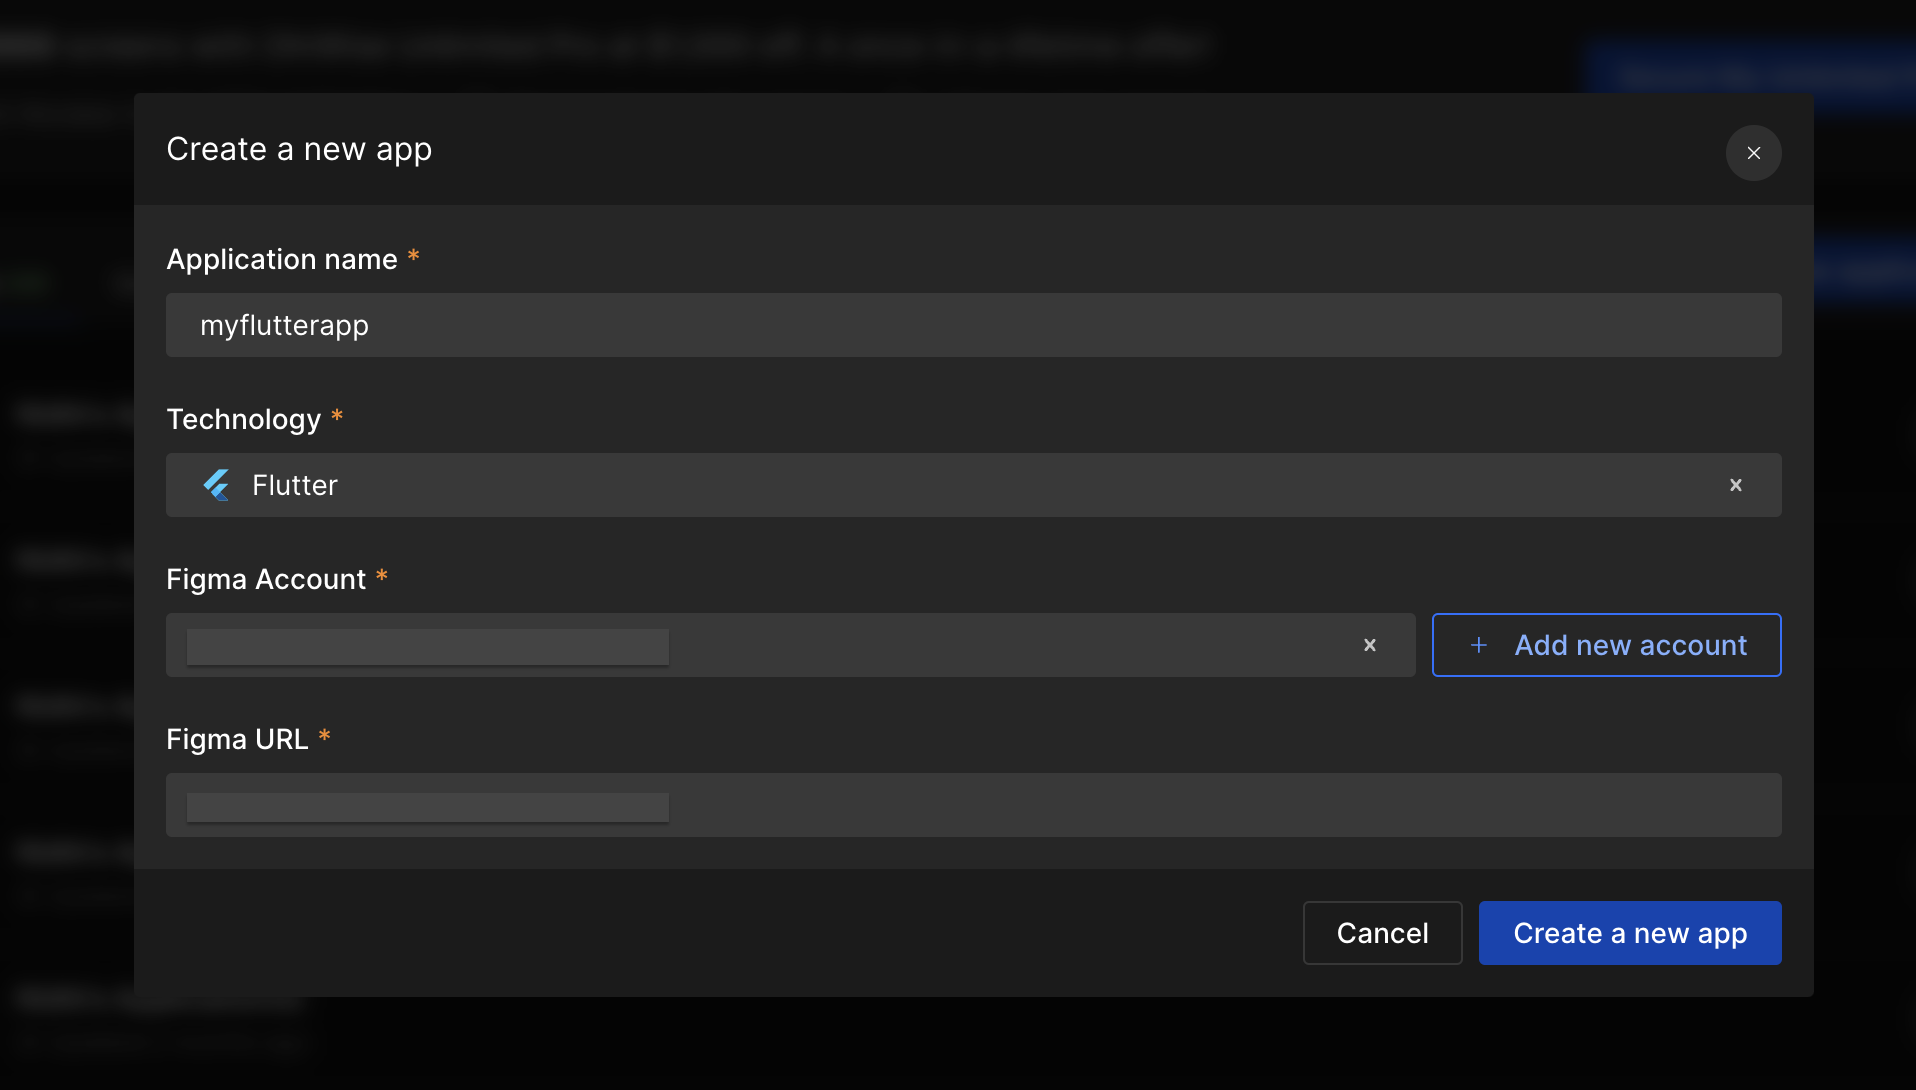
Select the same viewport size as that in your Figma design.
Step 3: Select screens and pages
Next, select screens/ pages of your choice for which you want to create an app or directly click on Select all screens, and click Submit to start fetching the selected resources from Figma design.
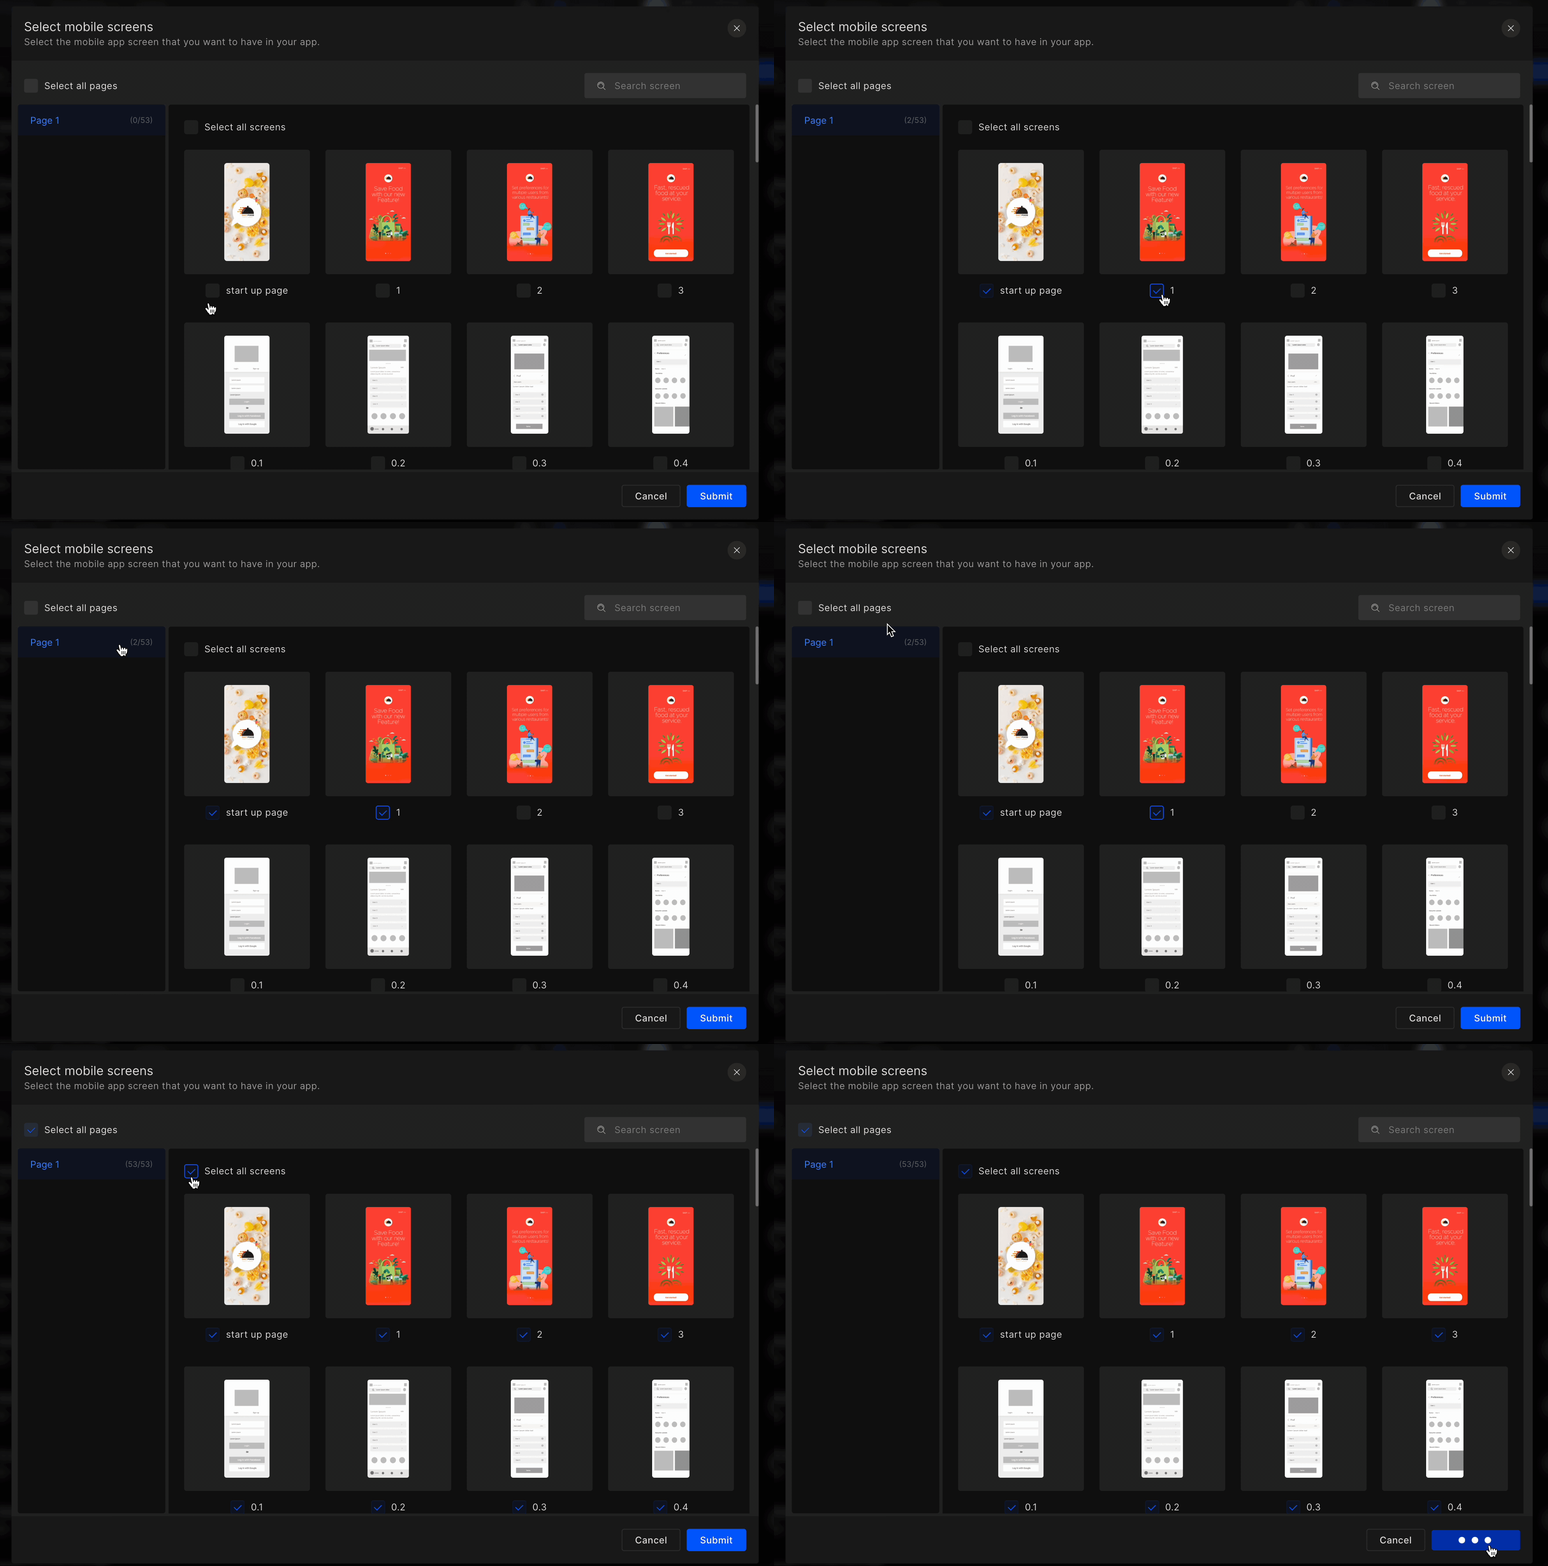
If you are trying to sync someone else’s private Figma, you won’t be able to access that design.
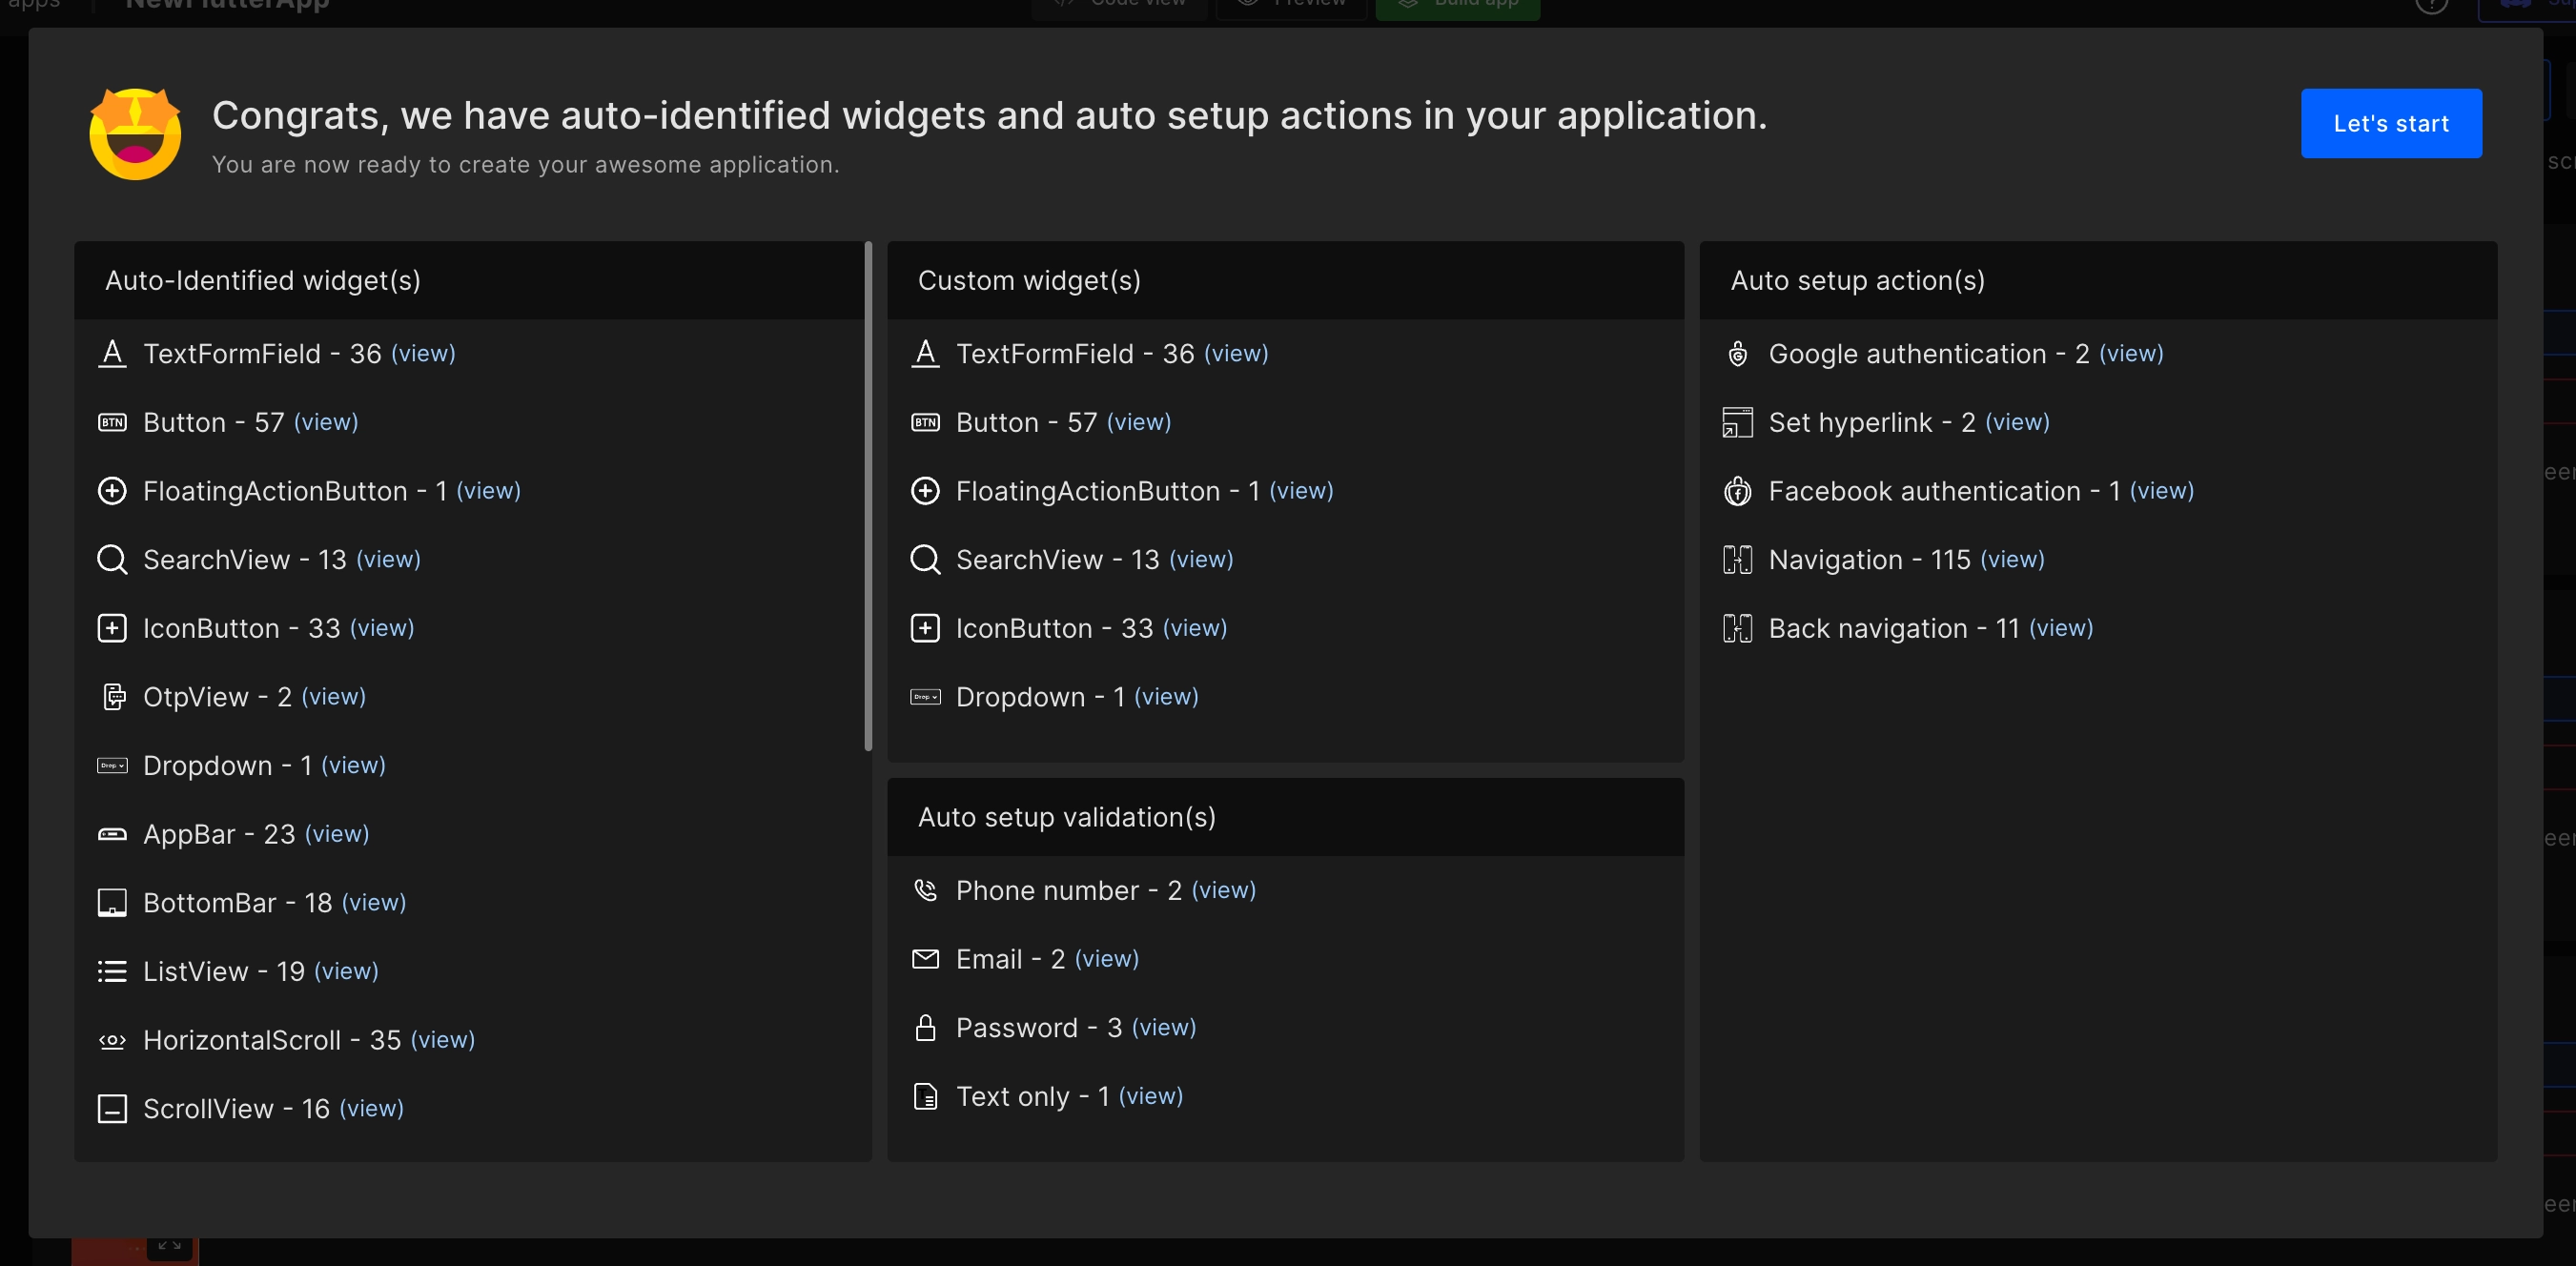
Step 4: Glance of auto-identified widgets and actions
As all your screens and Figma resources are fetched, whatever is auto-identified using DhiWise will be seen first in a Pop-up as below shown reference.
In this pop-up you will be able to find all the auto-identified widgets, custom widgets, validations, and actions like Navigation, Back Navigation, and Social Authentication.
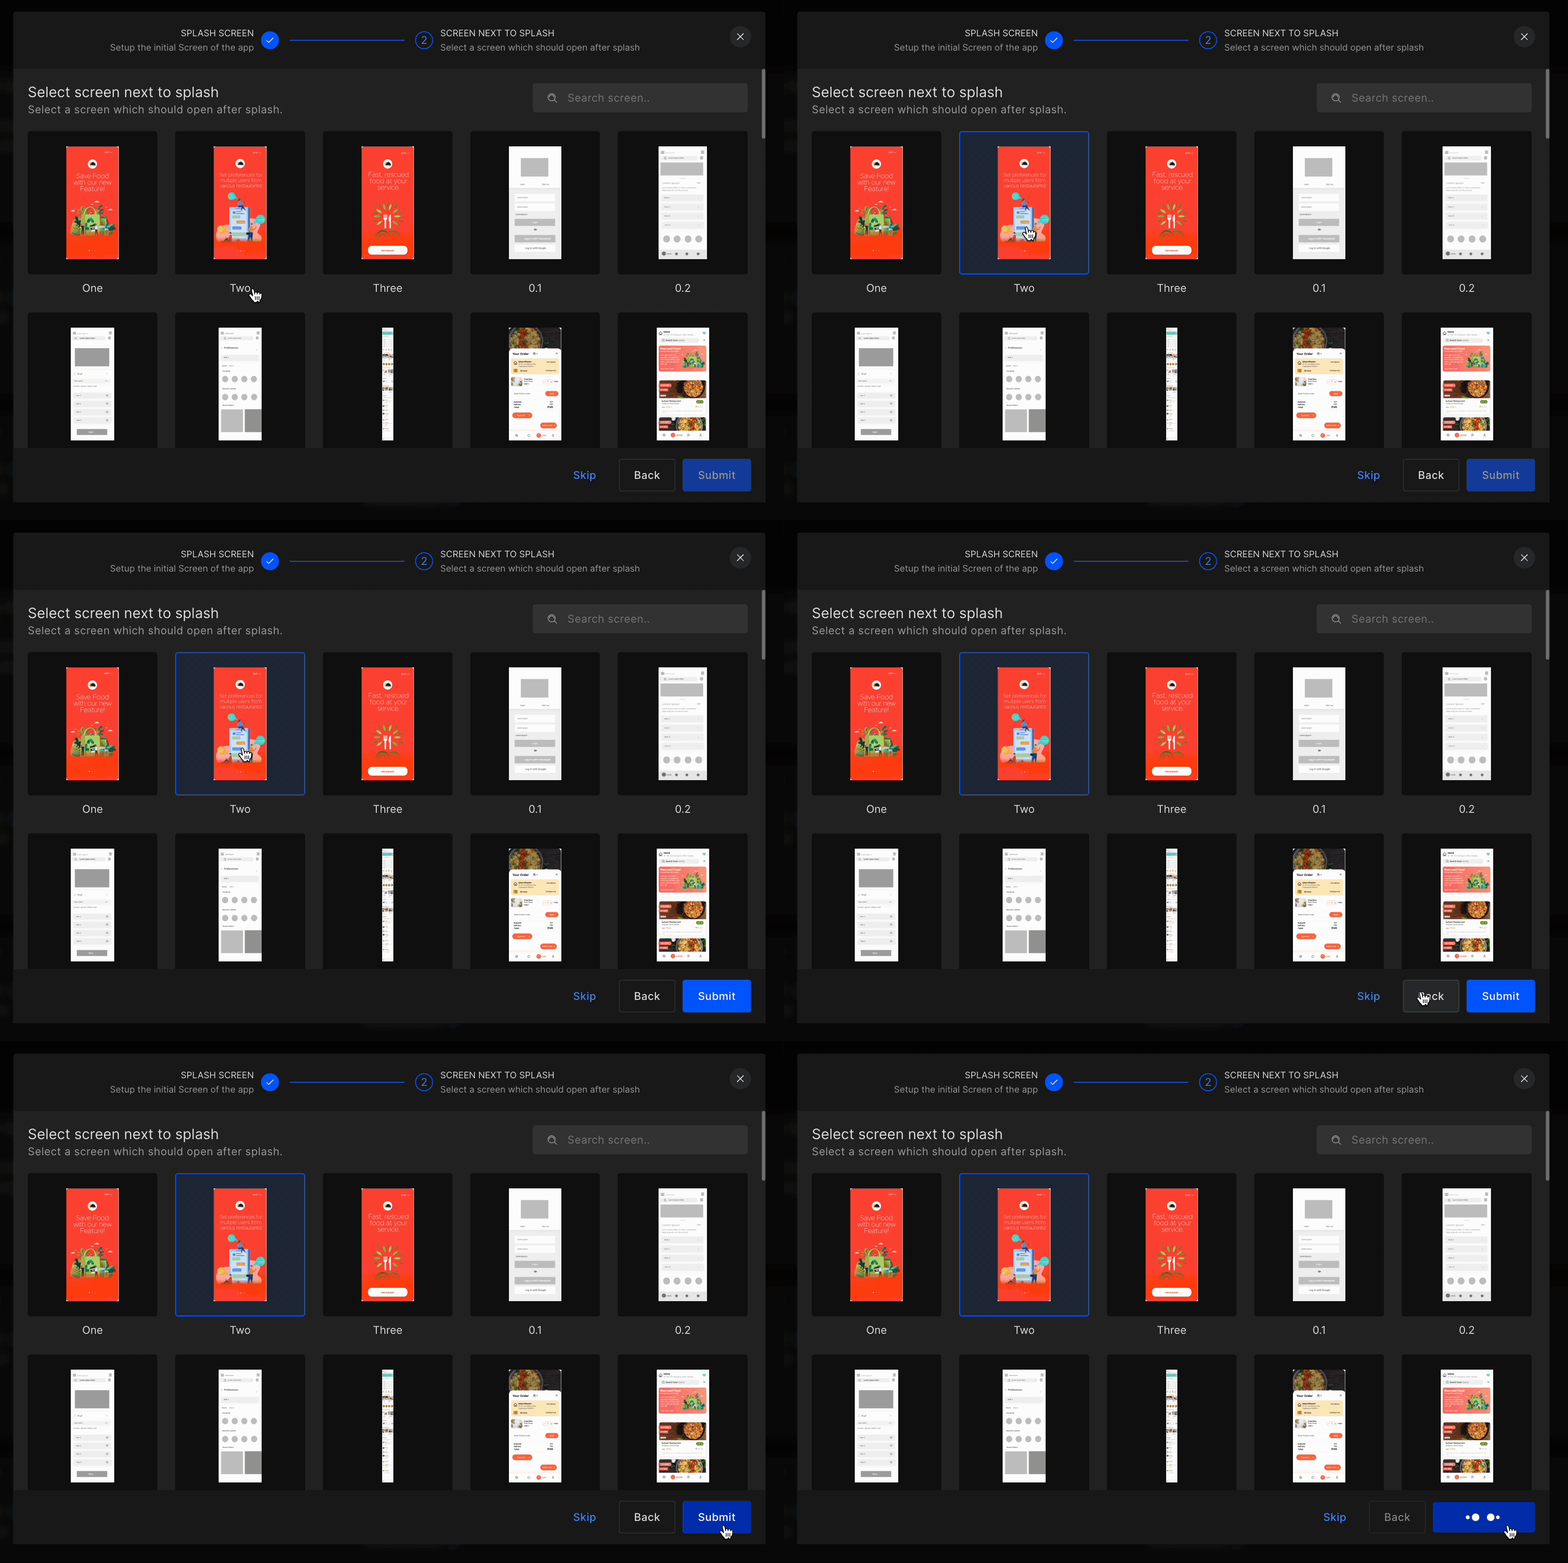
Step 5: Set up initial screens
Select Splash Screen
Choose your app's Splash screen to be appeared during app launch, from the list of application screens.
Select Screen Next to Splash
Choose a screen to be appeared after the Splash screen vanishes.
Create from templates
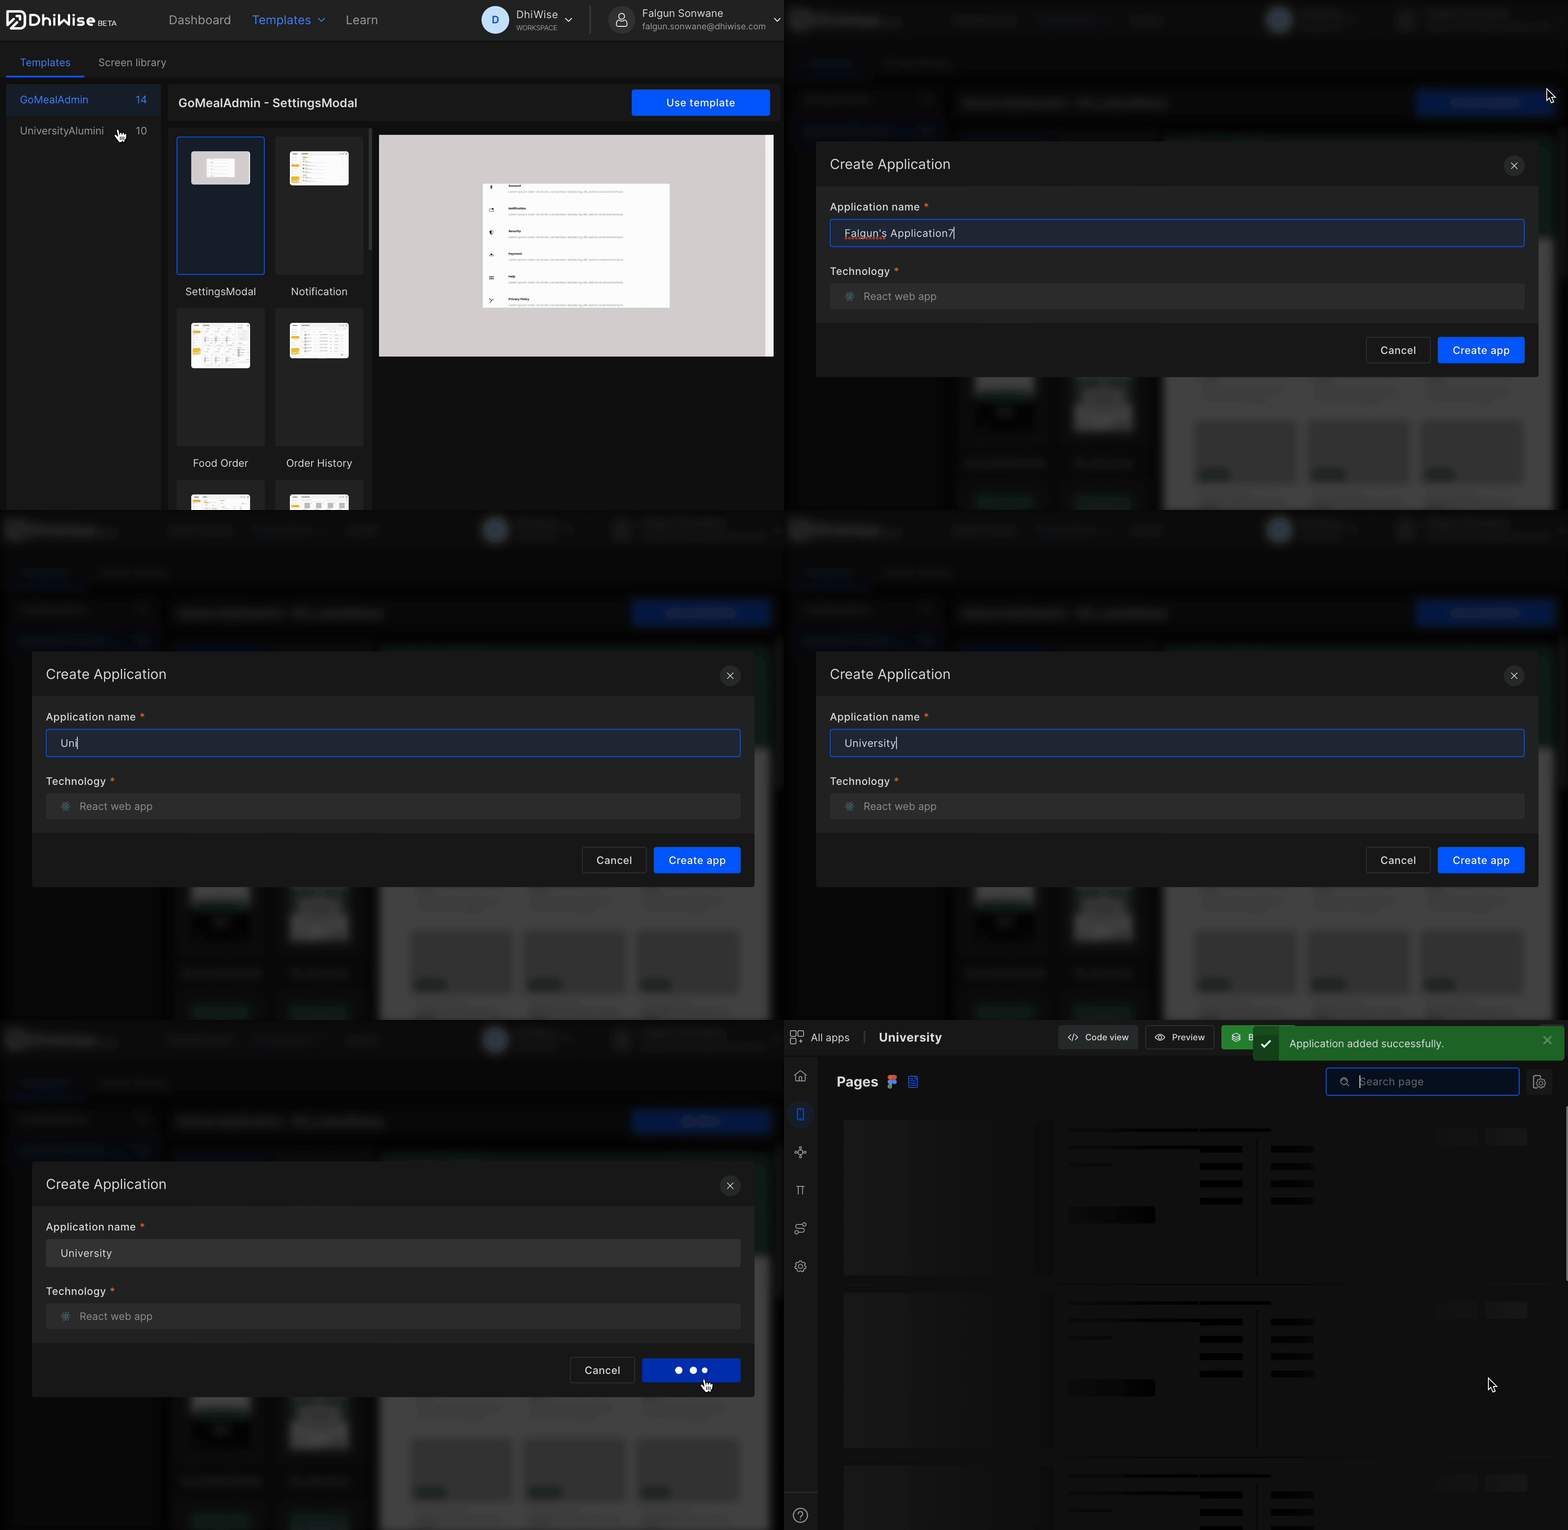
In case you do not have a design file or want to create one from a built-in template, choose one and create an app. DhiWise offers multiple production-ready app template designs with a various range of categories.
Step 1: Pick a template of your choice
Select a template based on category of your choice.
Step 2: Use template
Next, click on Use template
Step 3: Give app a name, choose technology as Flutter
Enter your Application name and select Technology as Flutter, click on Create app.
Create from screen library
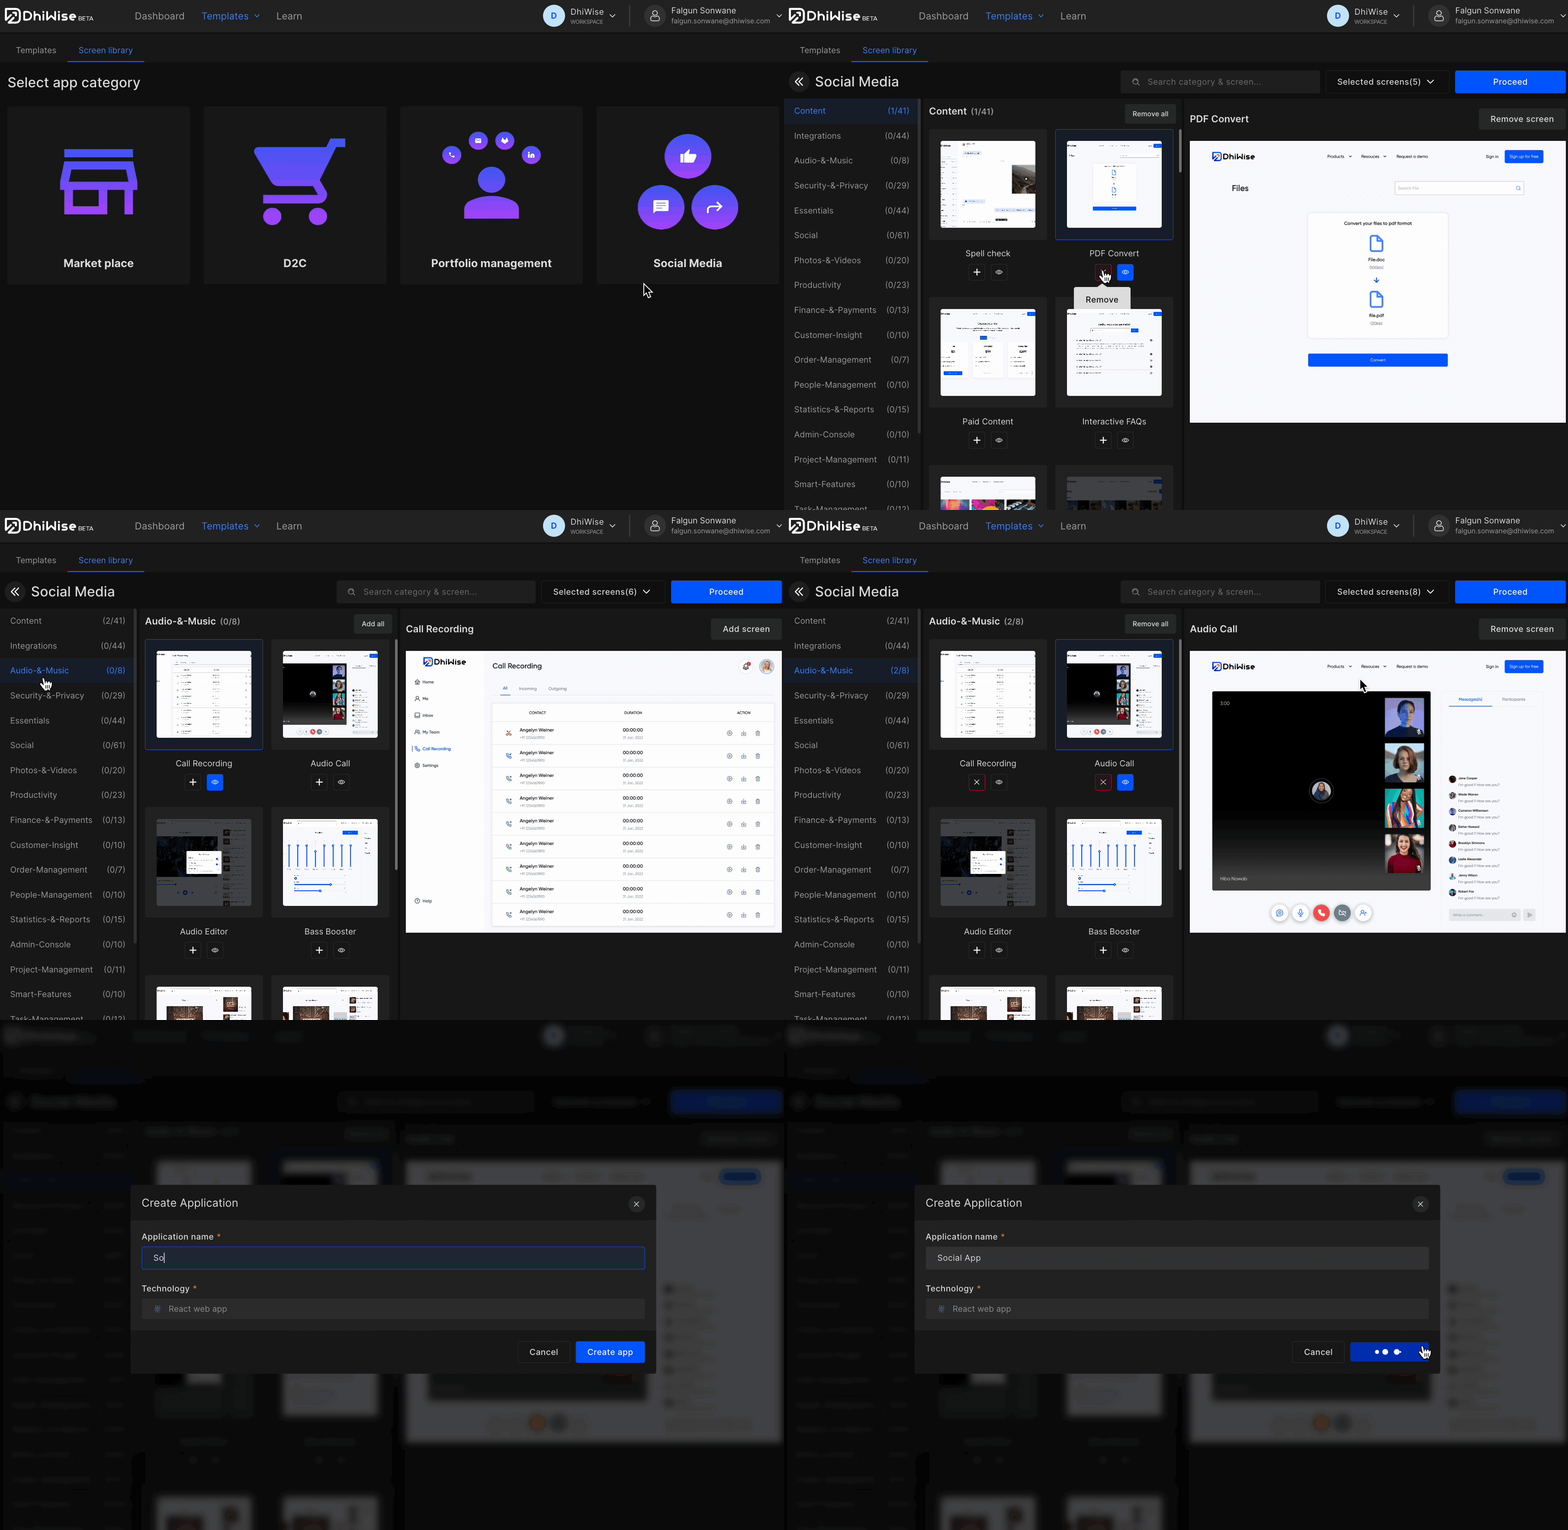
In case you do not have a design file you can also pick individual screens based on screen categories to create your app design quickly. For example, a login screen, authentication screen, and similarly other screens.
Step 1: Pick a category to select screens
Select an app category for your screens.
Step 2: Select screens
From the list of screens available for the selected category, click on ➕ to add a screen and on 👁️ to preview the screen. To remove a screen click on ❌.
Step 3: Give app a name, choose technology as Flutter
Enter your Application name and select Technology as Flutter, click on Create app.
Got a question? Ask here.