Manage App Lifecycle
The lifecycle of the Flutter app is how the application will change its state.
How to set up app lifecycle
Step 1: Select screen
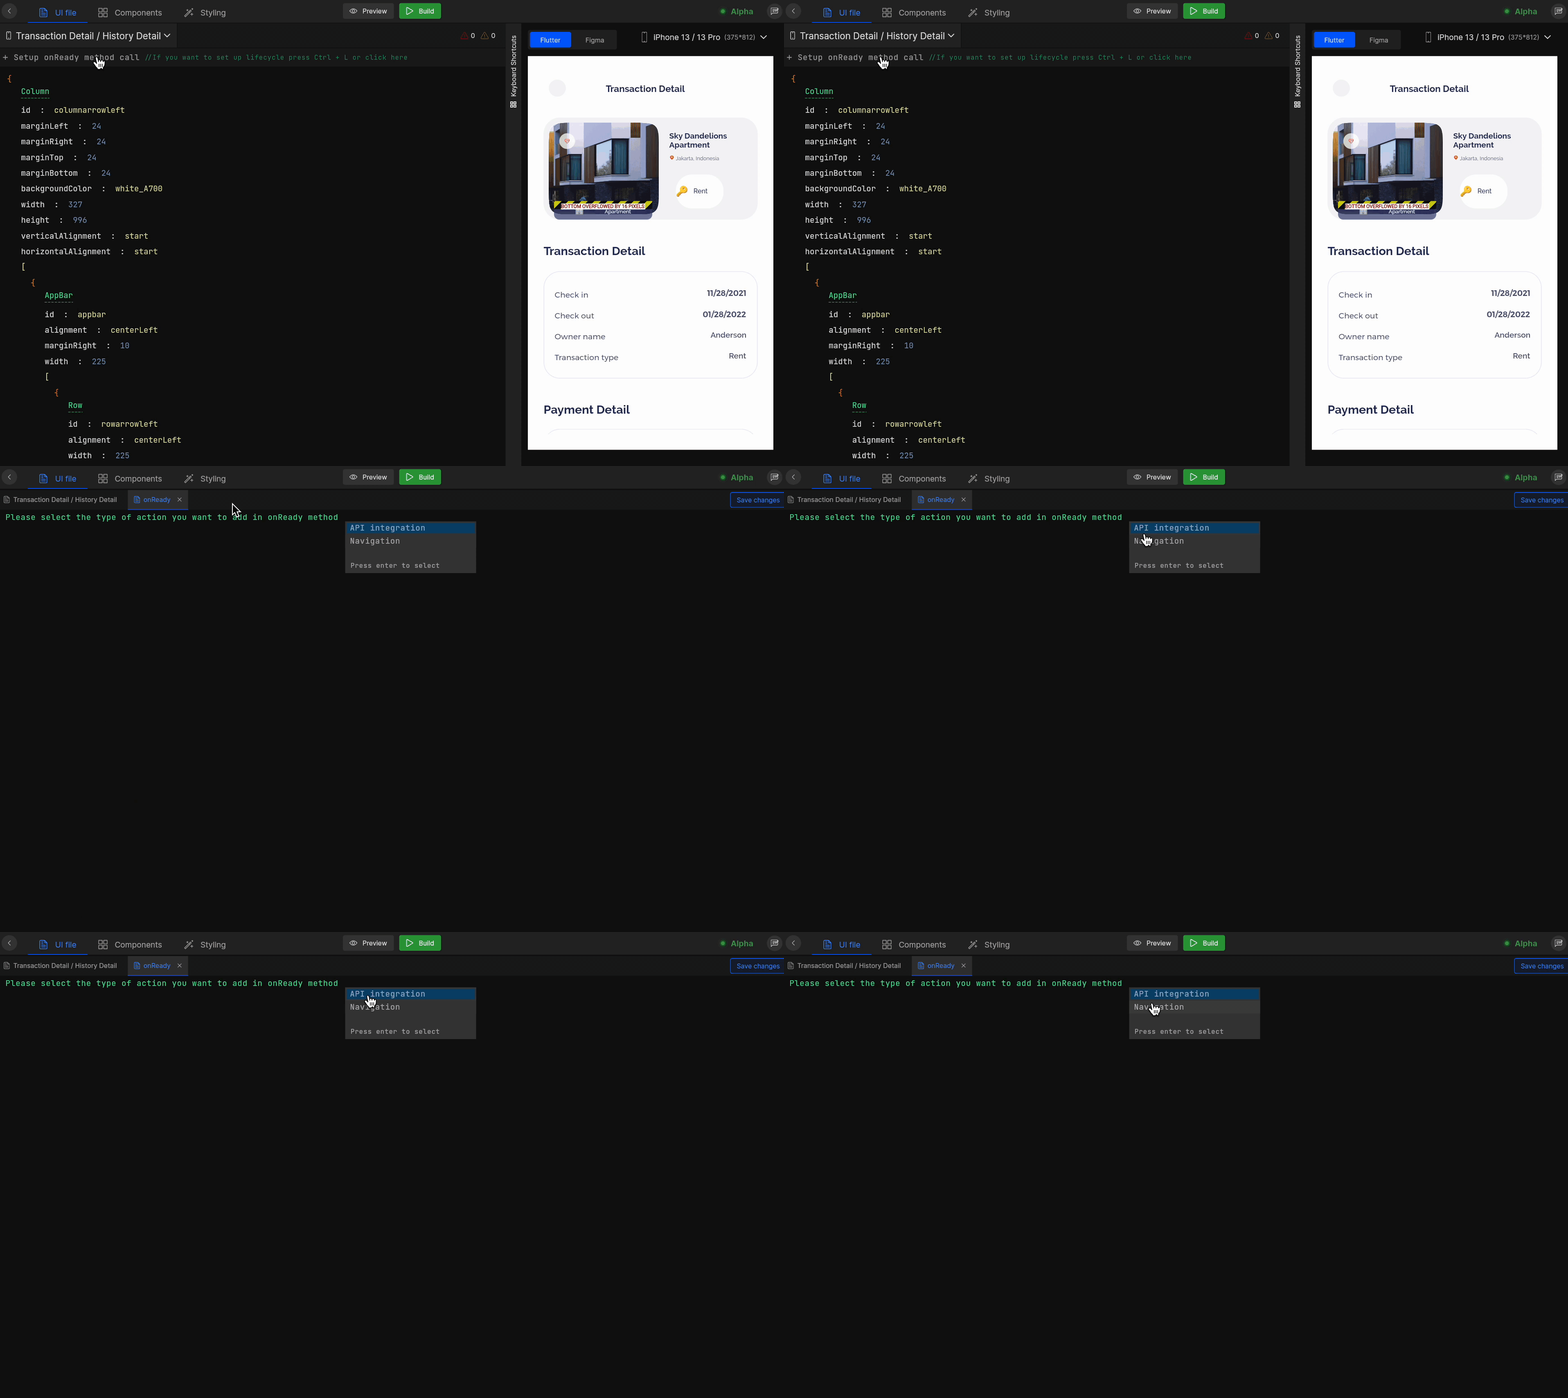
Select the screen from the screen list on which you want to set up the lifecycle.
Step 2: Go to onReady method call set up
Click on Setup onReady method call available in the top left corner below the screen selection dropdown or simply press Ctrl + L to set up lifecycle for a screen.

Step 3: Select action
Next, select the action to be performed in the on Ready state.
Below is the list of supported actions:
API Integration
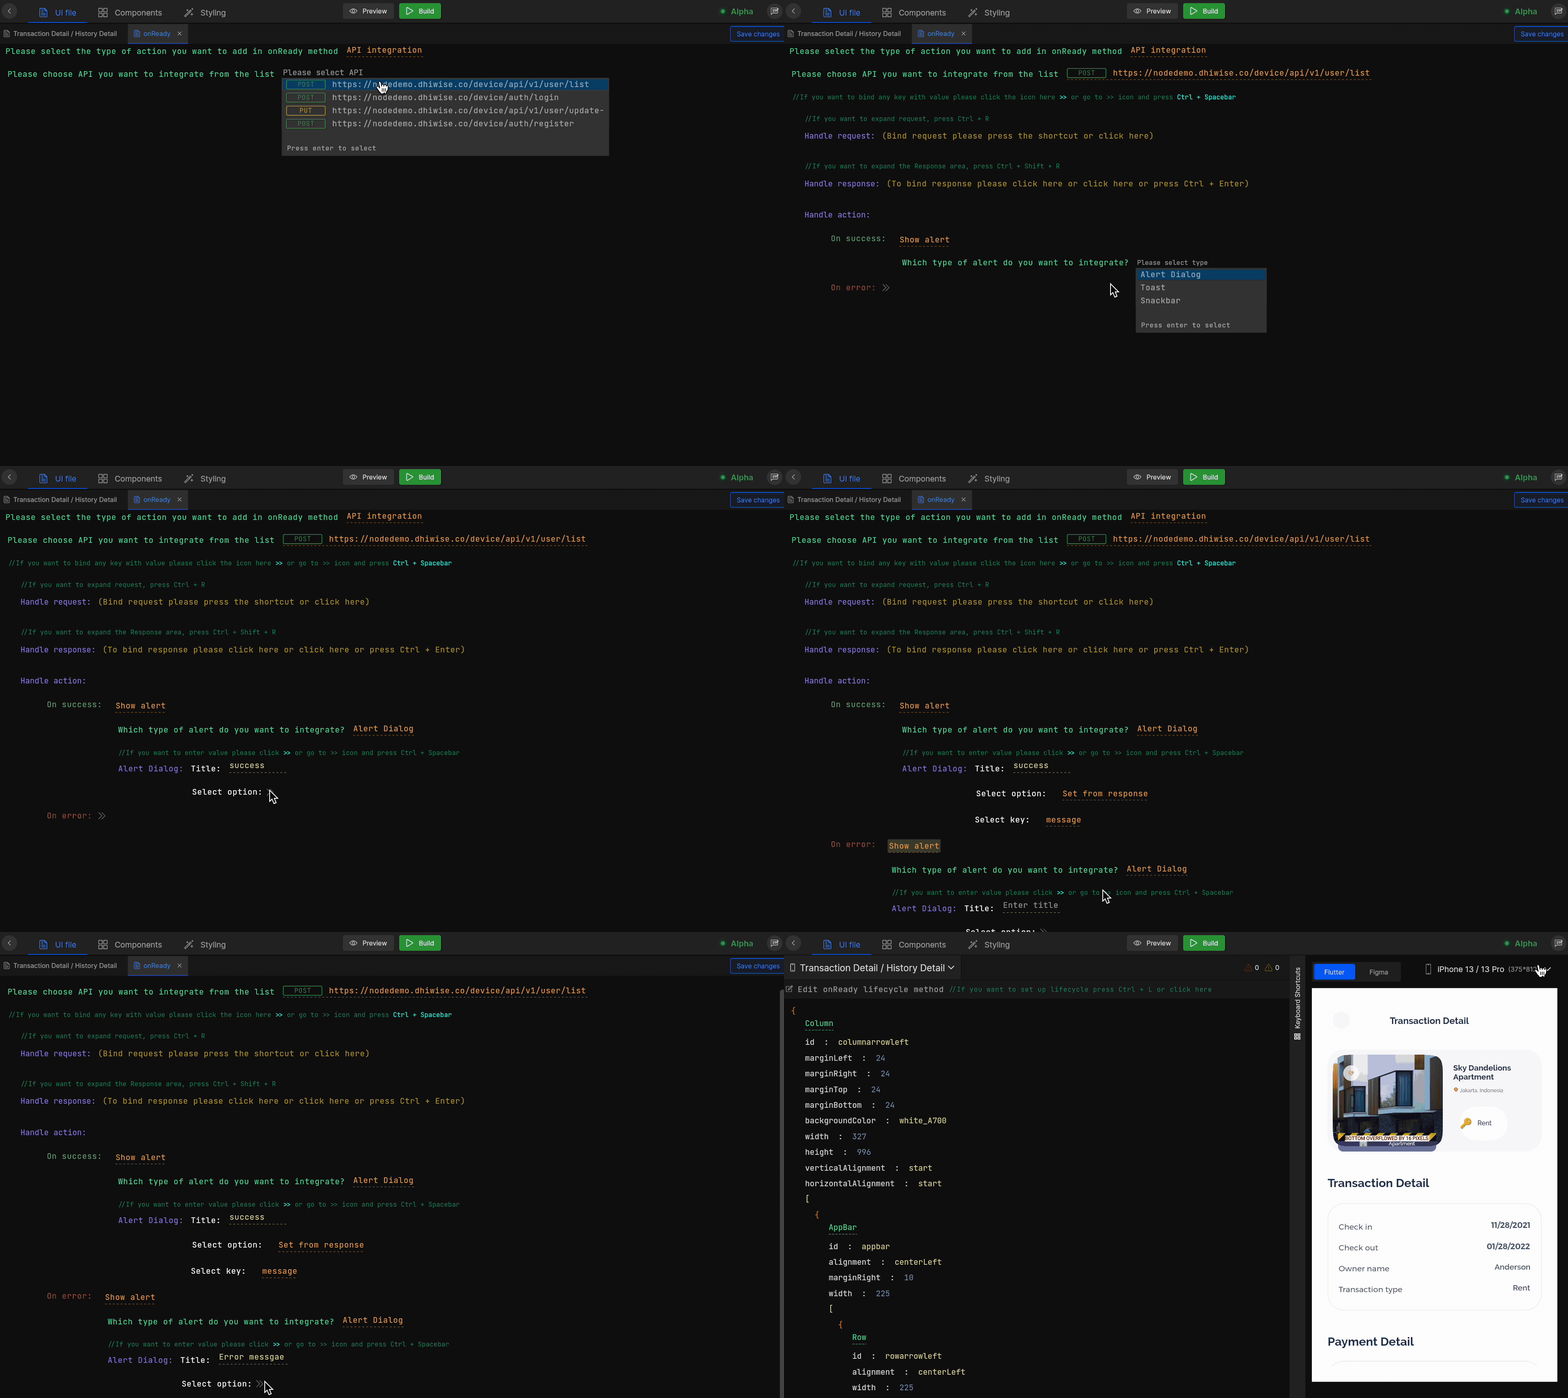
Integrate APIs to your app lifecycle, simply select
API Integration, and select the API from the list of APIs, that you want to call on invoking the method. Also, you can add new API to your application in DhiWise. Learn more
Navigation
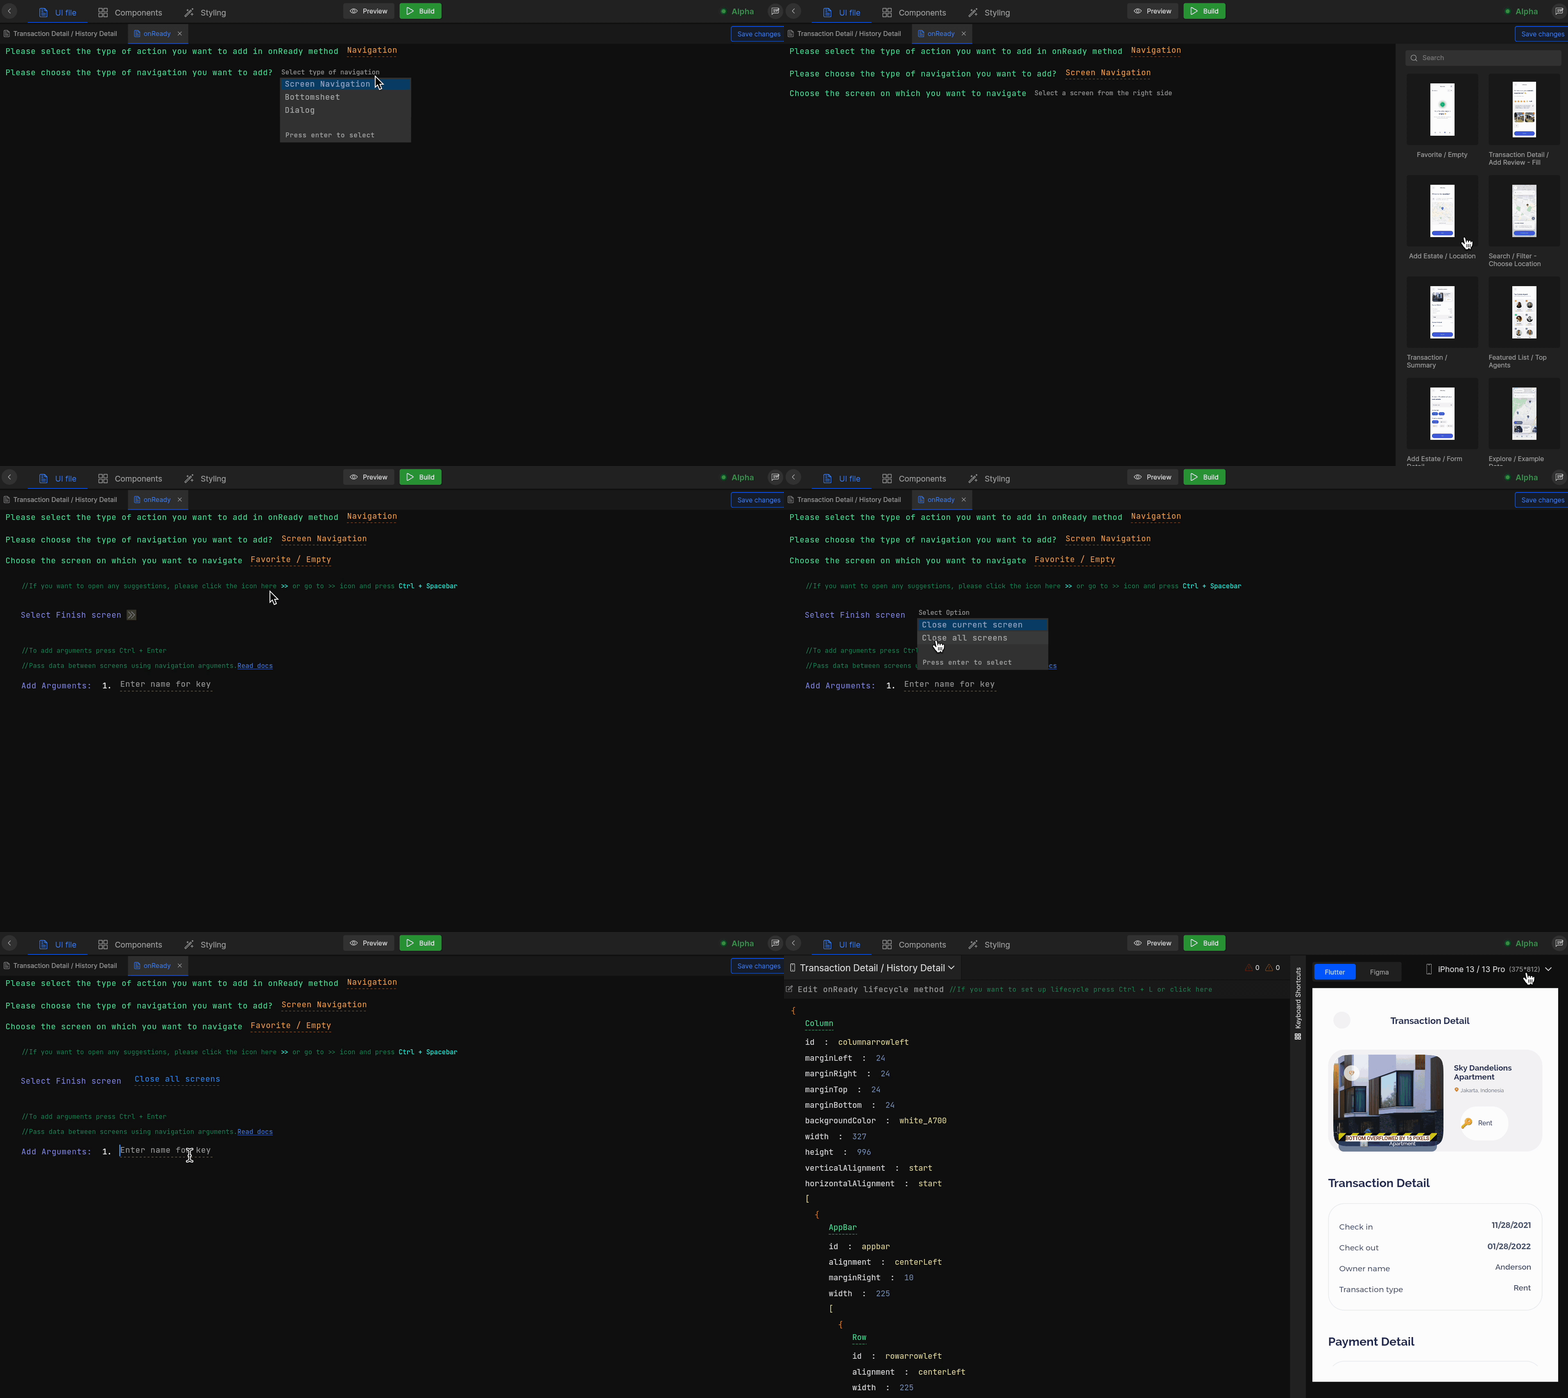
Set navigation on lifecycle method by selecting Navigation from the list. Learn more

Show alert
You can set up an Alert dialog, Snackbar, or Toast on the application’s lifecycle method Learn more
Permissions
Add Permissions to your app lifecycle, this will ask for Permission on the
on Readystate of an application. You can set Camera + Gallery, Store Permission, Location, and Contact list types of permission. Learn more
Step 4: Save changes
Select the appropriate action and click on Save changes.
Got a question? Ask here.