Change Component
The words; "Custom component" and "Change component" are no longer present. The features have been renamed and combined with the "Component" feature. This ensures that all existing features remain in place. Custom component is now renamed to "Create new component" and "Change component" is renamed to "Convert to existing component".
To learn more, visit the Component page.
After fetching your design, DhiWise identifies all the components in your webpage. The identified components can be checked under the layout tree. You can click on any component and change component type from the component list that we support.
For example, if a component is unidentified or misidentified then with this feature its view type can be changed e.g. from an Input to a Button.
We support the change component feature for the below components:
- Column Inputs
- Form Inputs
- Slider Inputs
Row | Chart | List | SearchView | TextImage | CircleImage | Stack | Grid | Line | Header | Footer | GoogleMap | TabButton | Input | Radio | Radio Group | CheckBox | Dropdown | DatePicker | TextAreaSlider | Previous control | Next control | Page indicatorBelow are the few examples of change component:
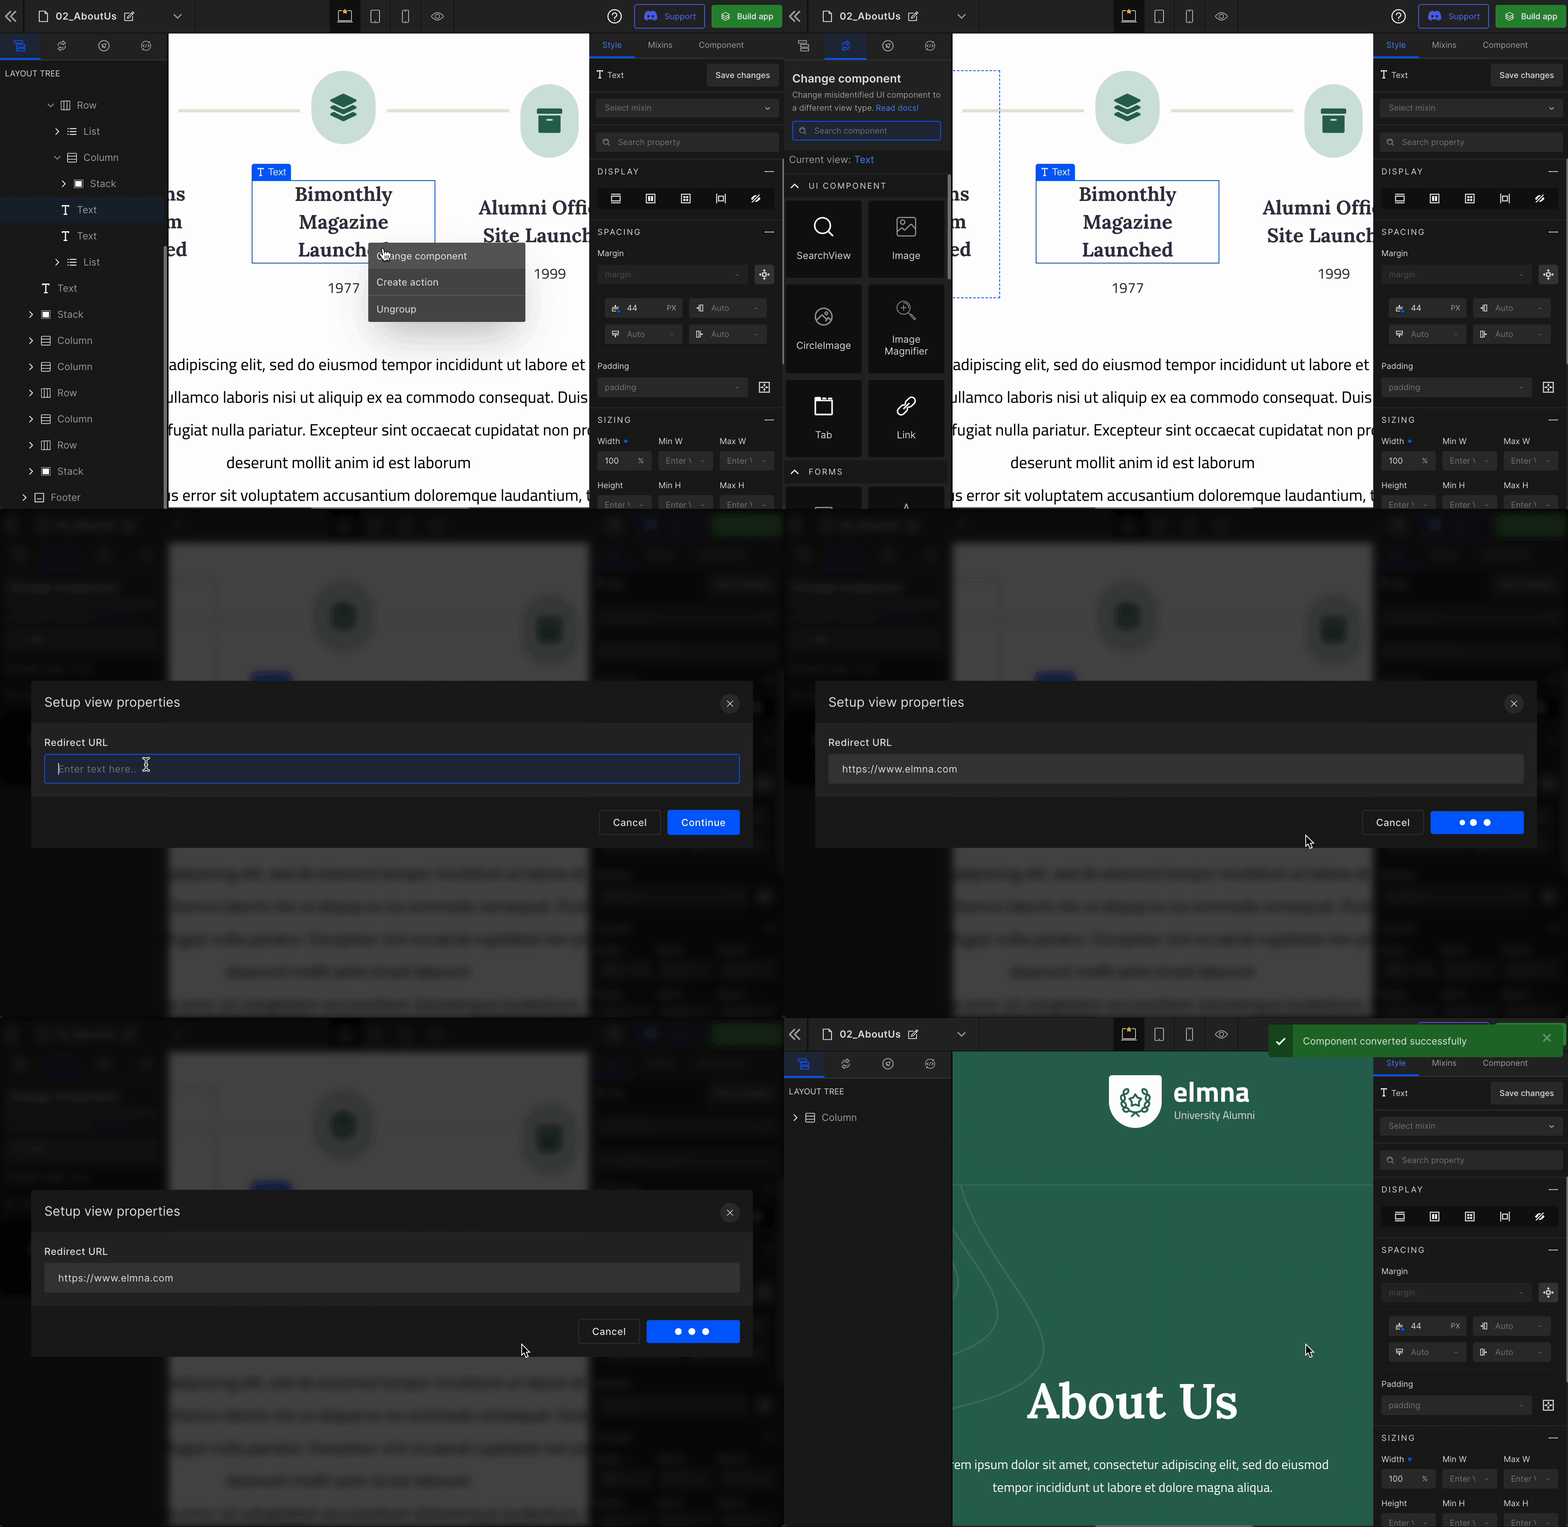
Change Text to Link
Convert Text to the Link component by following the below steps.
Select Text element
Right-click and select
Change ComponentSelect Link
Enter the valid URL ->
Continue
Change component to Chart
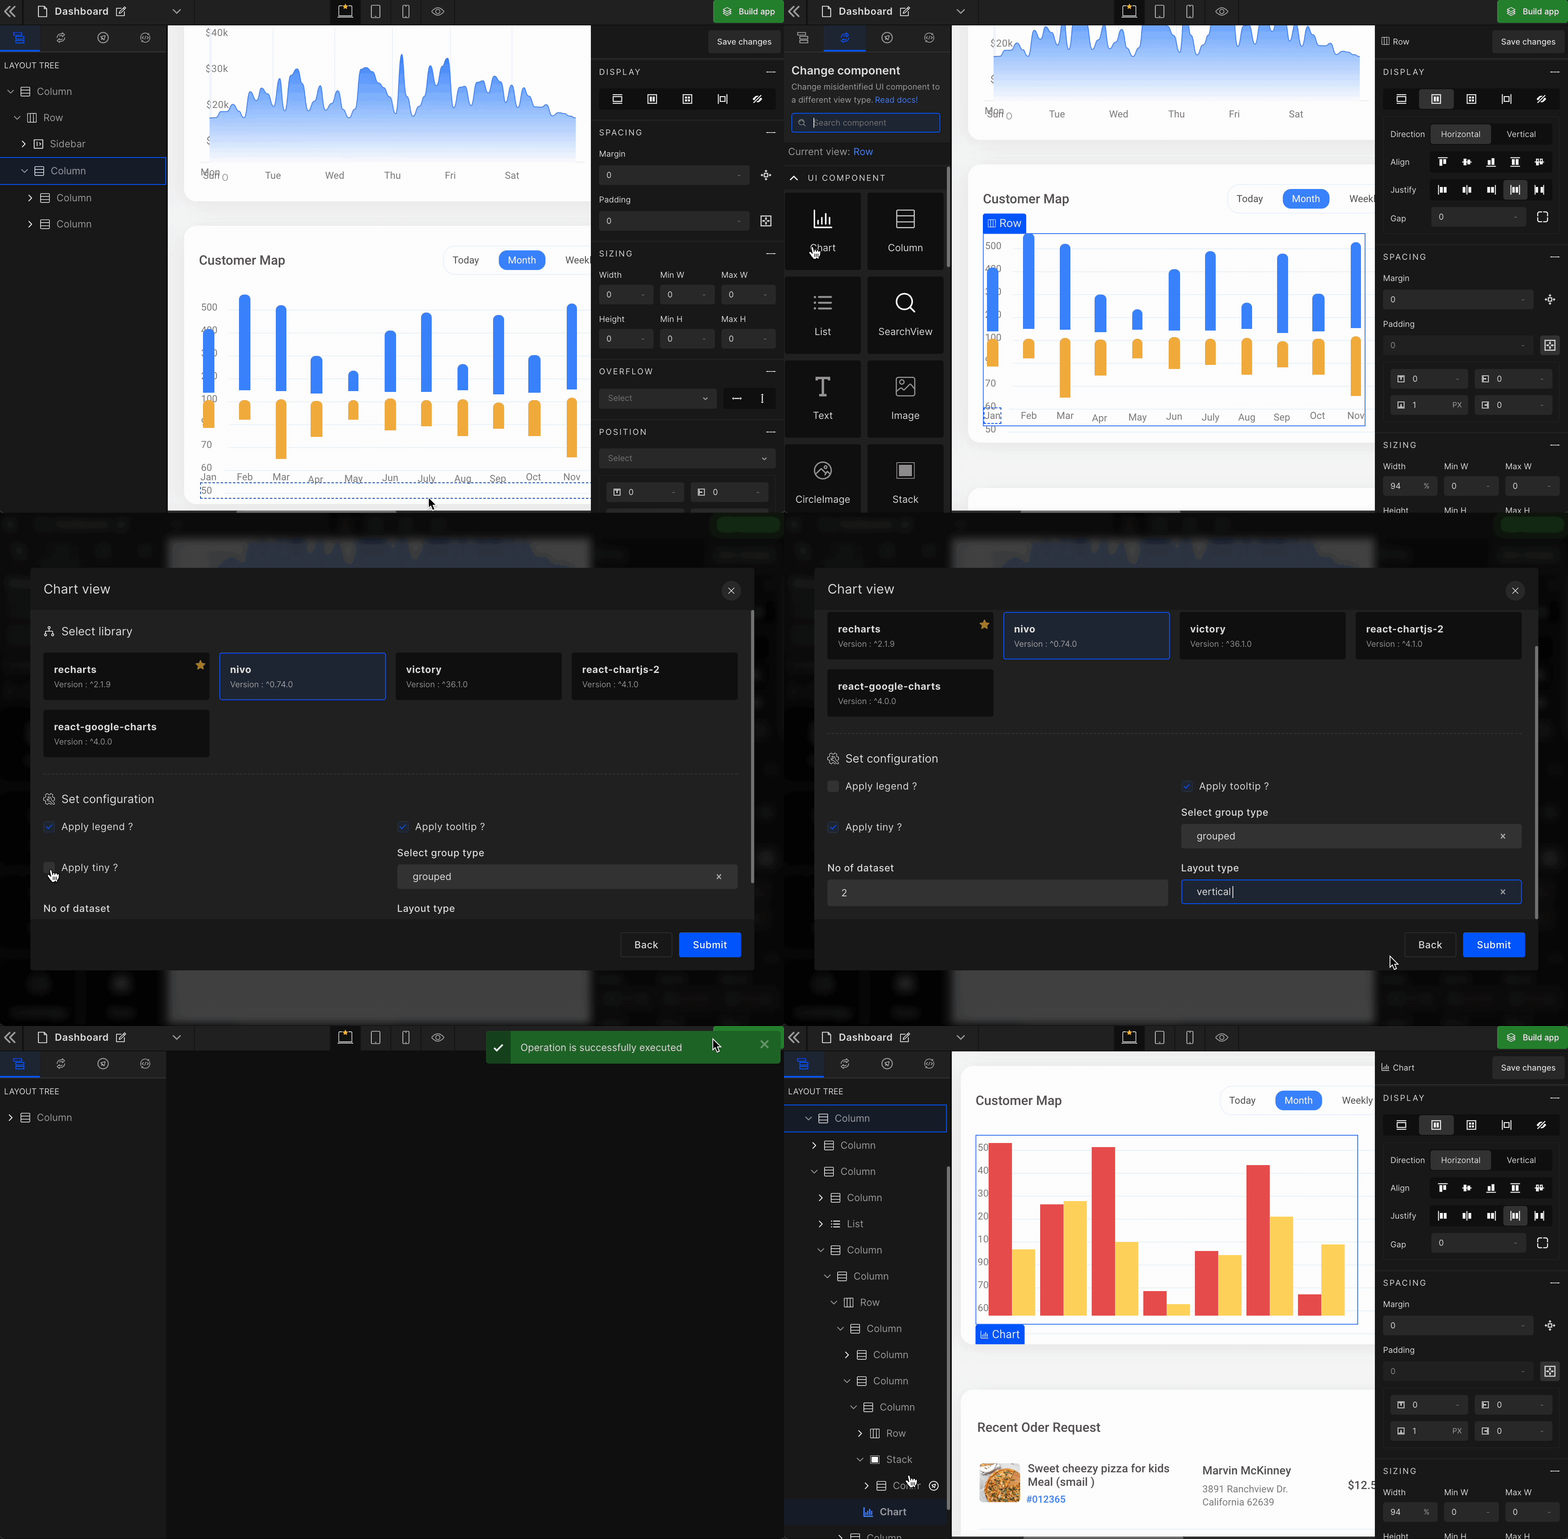
If your web page has images of Charts, then convert them into real Charts following the below steps.
Pick a component to convert
Select
Change componentSelect Chart
Select Chart type
Line|Bar|Pie|Scatter|Area|Radar|Bubble|Candlestick|Doughnut|Composed|Sankey|Treemap|Funnel|Radialbar
- Select a library
recharts|nivo|victory|react-chart-js-2|react-google-charts
- Configure the Chart view
- Apply legend
- Apply tiny
- Apply tooltip
- Select the group type
- No. of data set - Input the no. of data set you require
- Select layout type - Vertical or Horizontal
Change component to Slider
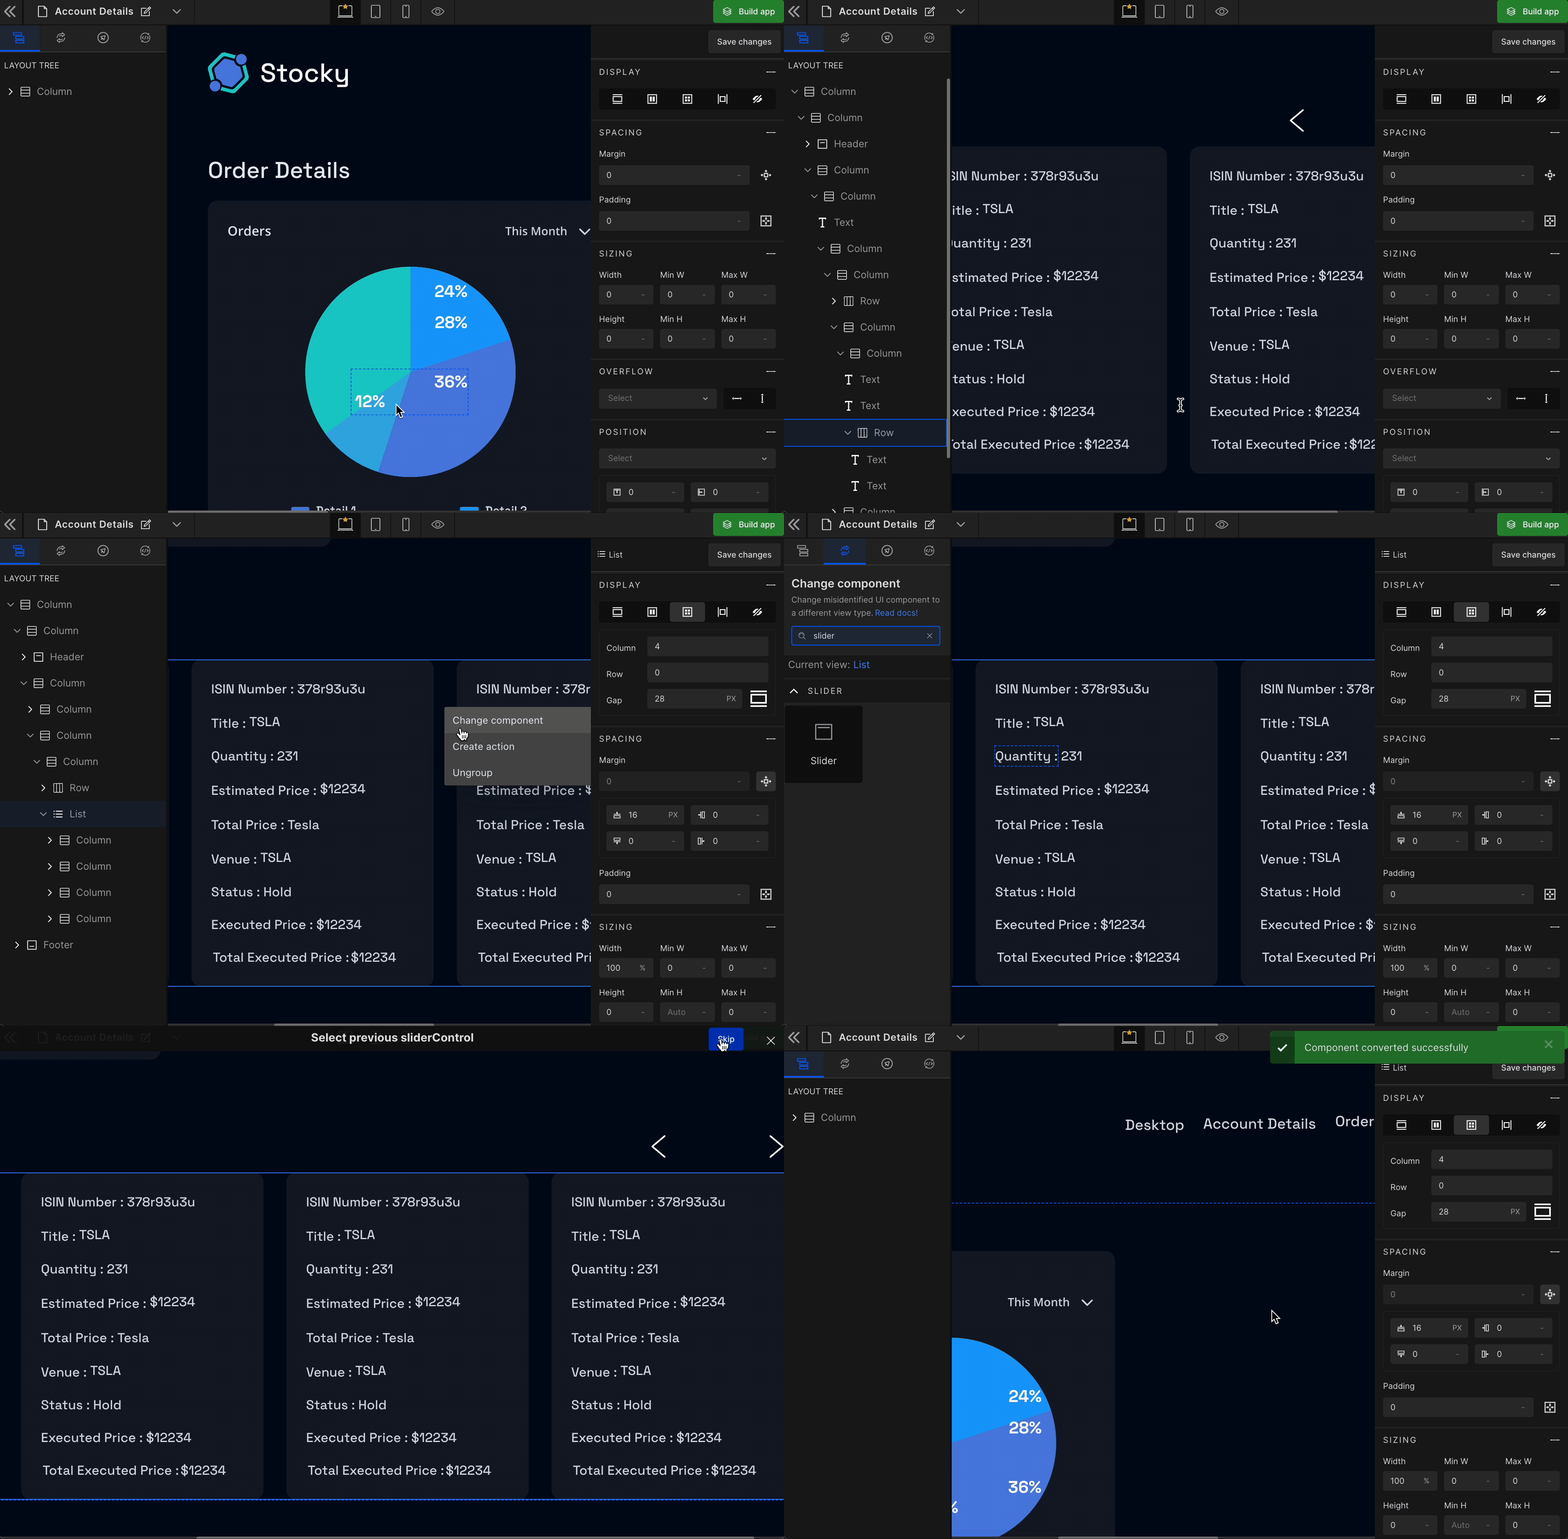
Convert a list component in your webpage into a Slider. You require a list and two arrow-like images from the list to move forward & backward.
Select the component to convert
Select
Change componentSelect the Slider type
Select the page indicators ->
Save
Change component to Tab
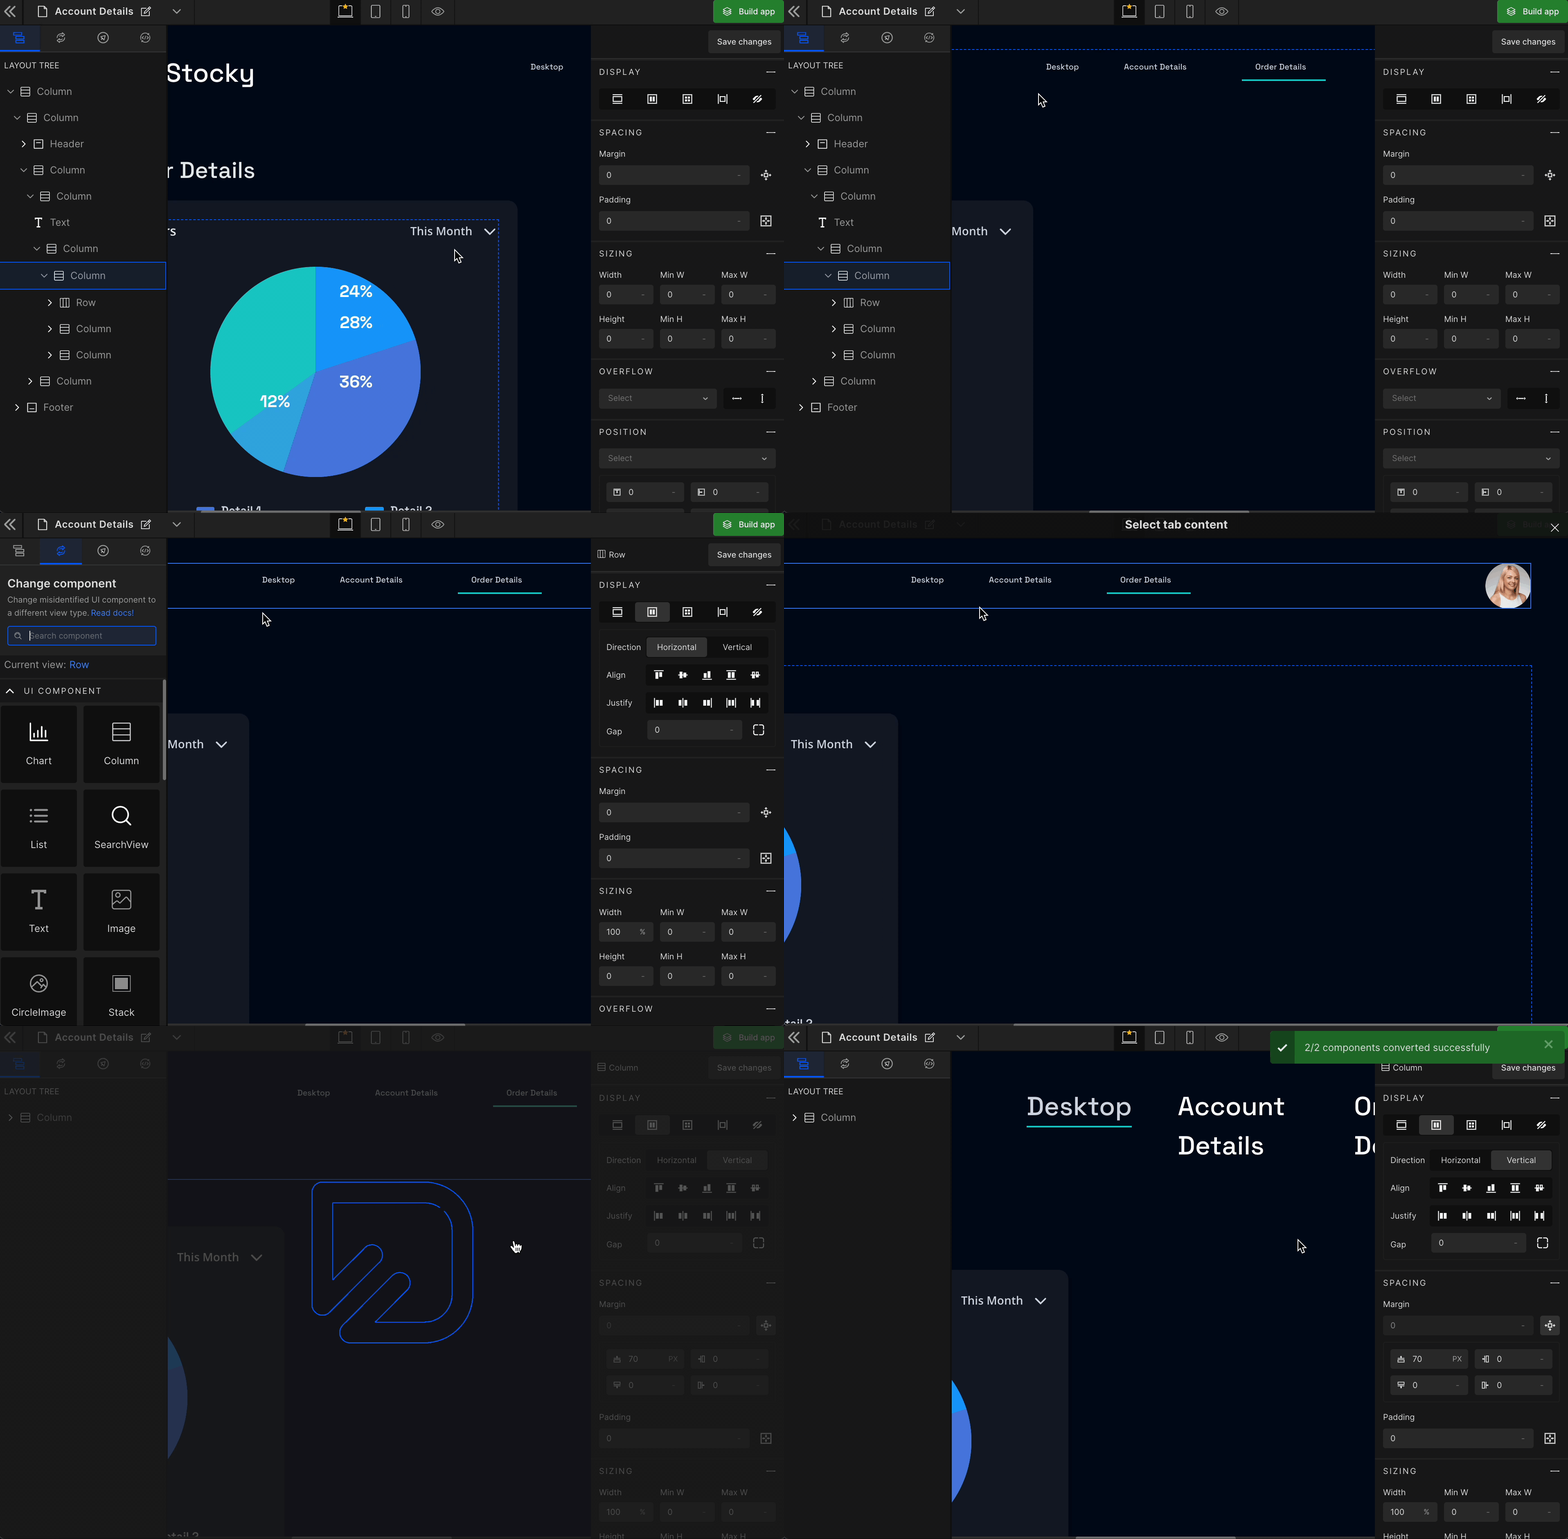
The Tab design on your webpage may be identified as a row component. However, you can convert it to a Tab by following the below steps:
Select Tab Design
Select
Change componentSelect Tab
- Pick any Tab content from the current webpage.
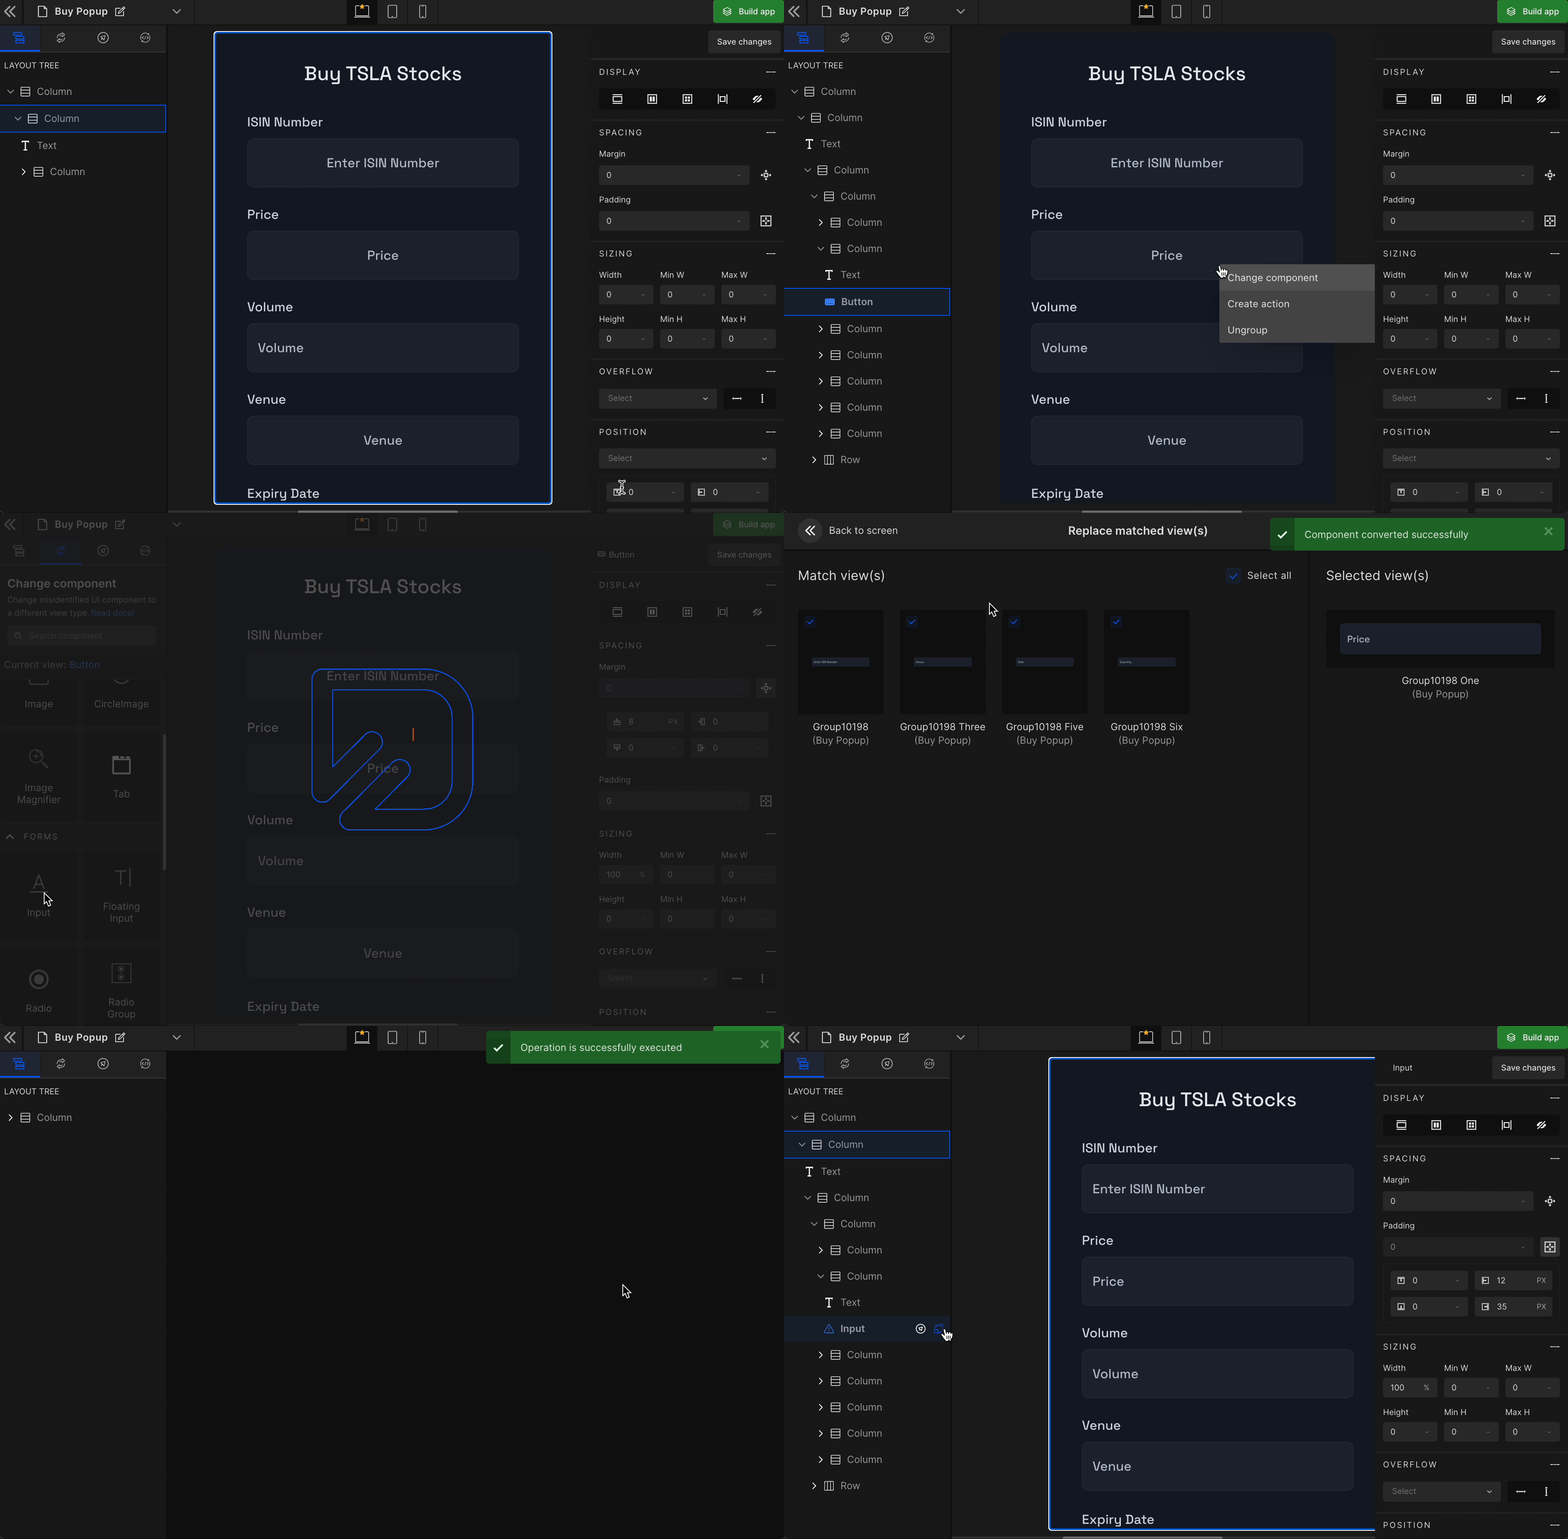
Change component to Input
The Input field on your webpage may be identified as a row. Therefore, convert it to the Input component by following the below steps.
Select Input design
Select
Change ComponentSelect Input
Click
Convert to Input
Change component to Table
Once the design is fetched, DhiWise automatically detects all the components. Also, DhiWise offers the freedom to change the components as and when required. The hierarchy of components can be seen in the Layout Tree tab.
The detected components can be changed to any of the components that are supported by DhiWise. A component can be easily converted to a table component with just a few clicks.
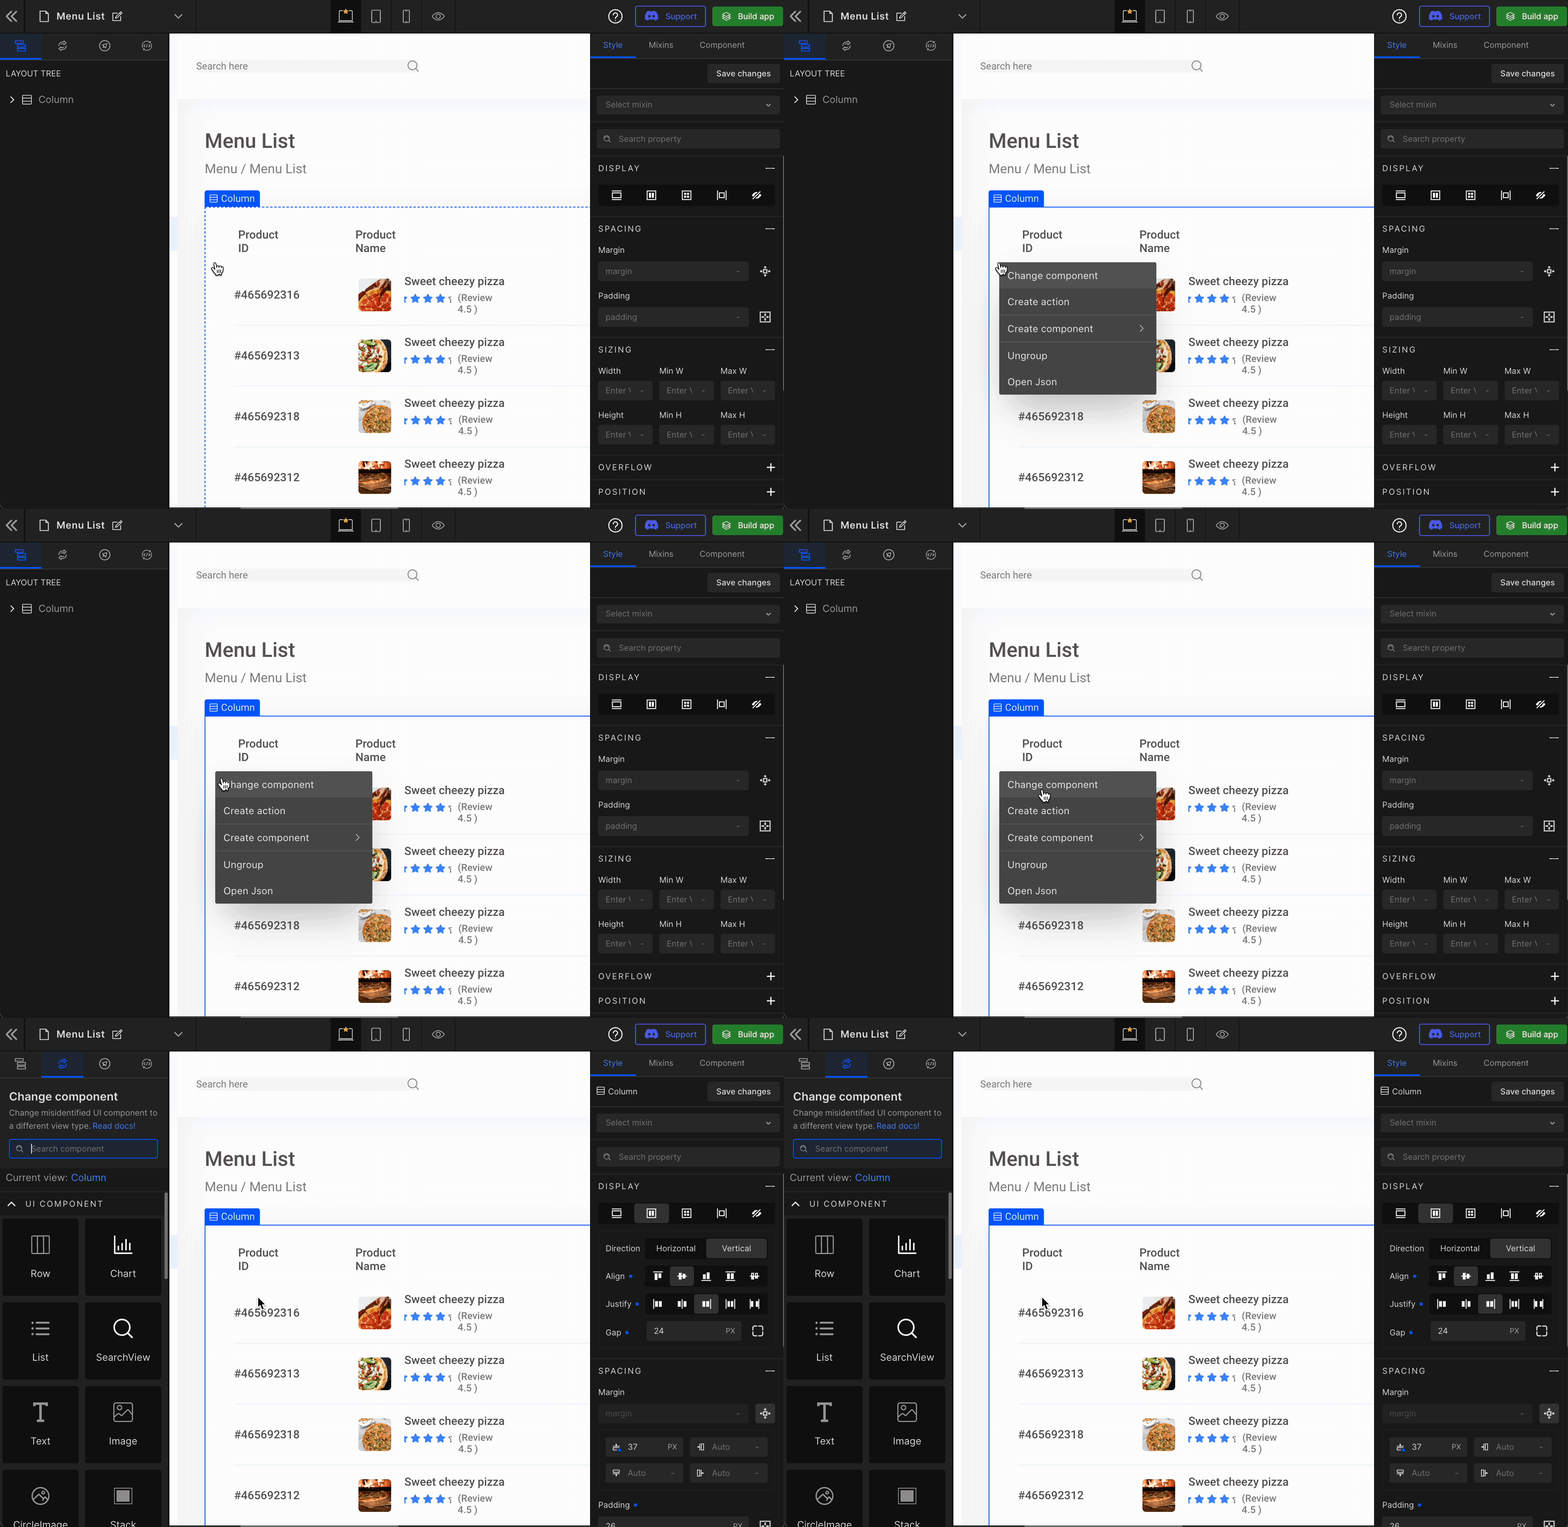
Step 1: Right-click on the component from the canvas that’s to be converted and select “Change Component”.
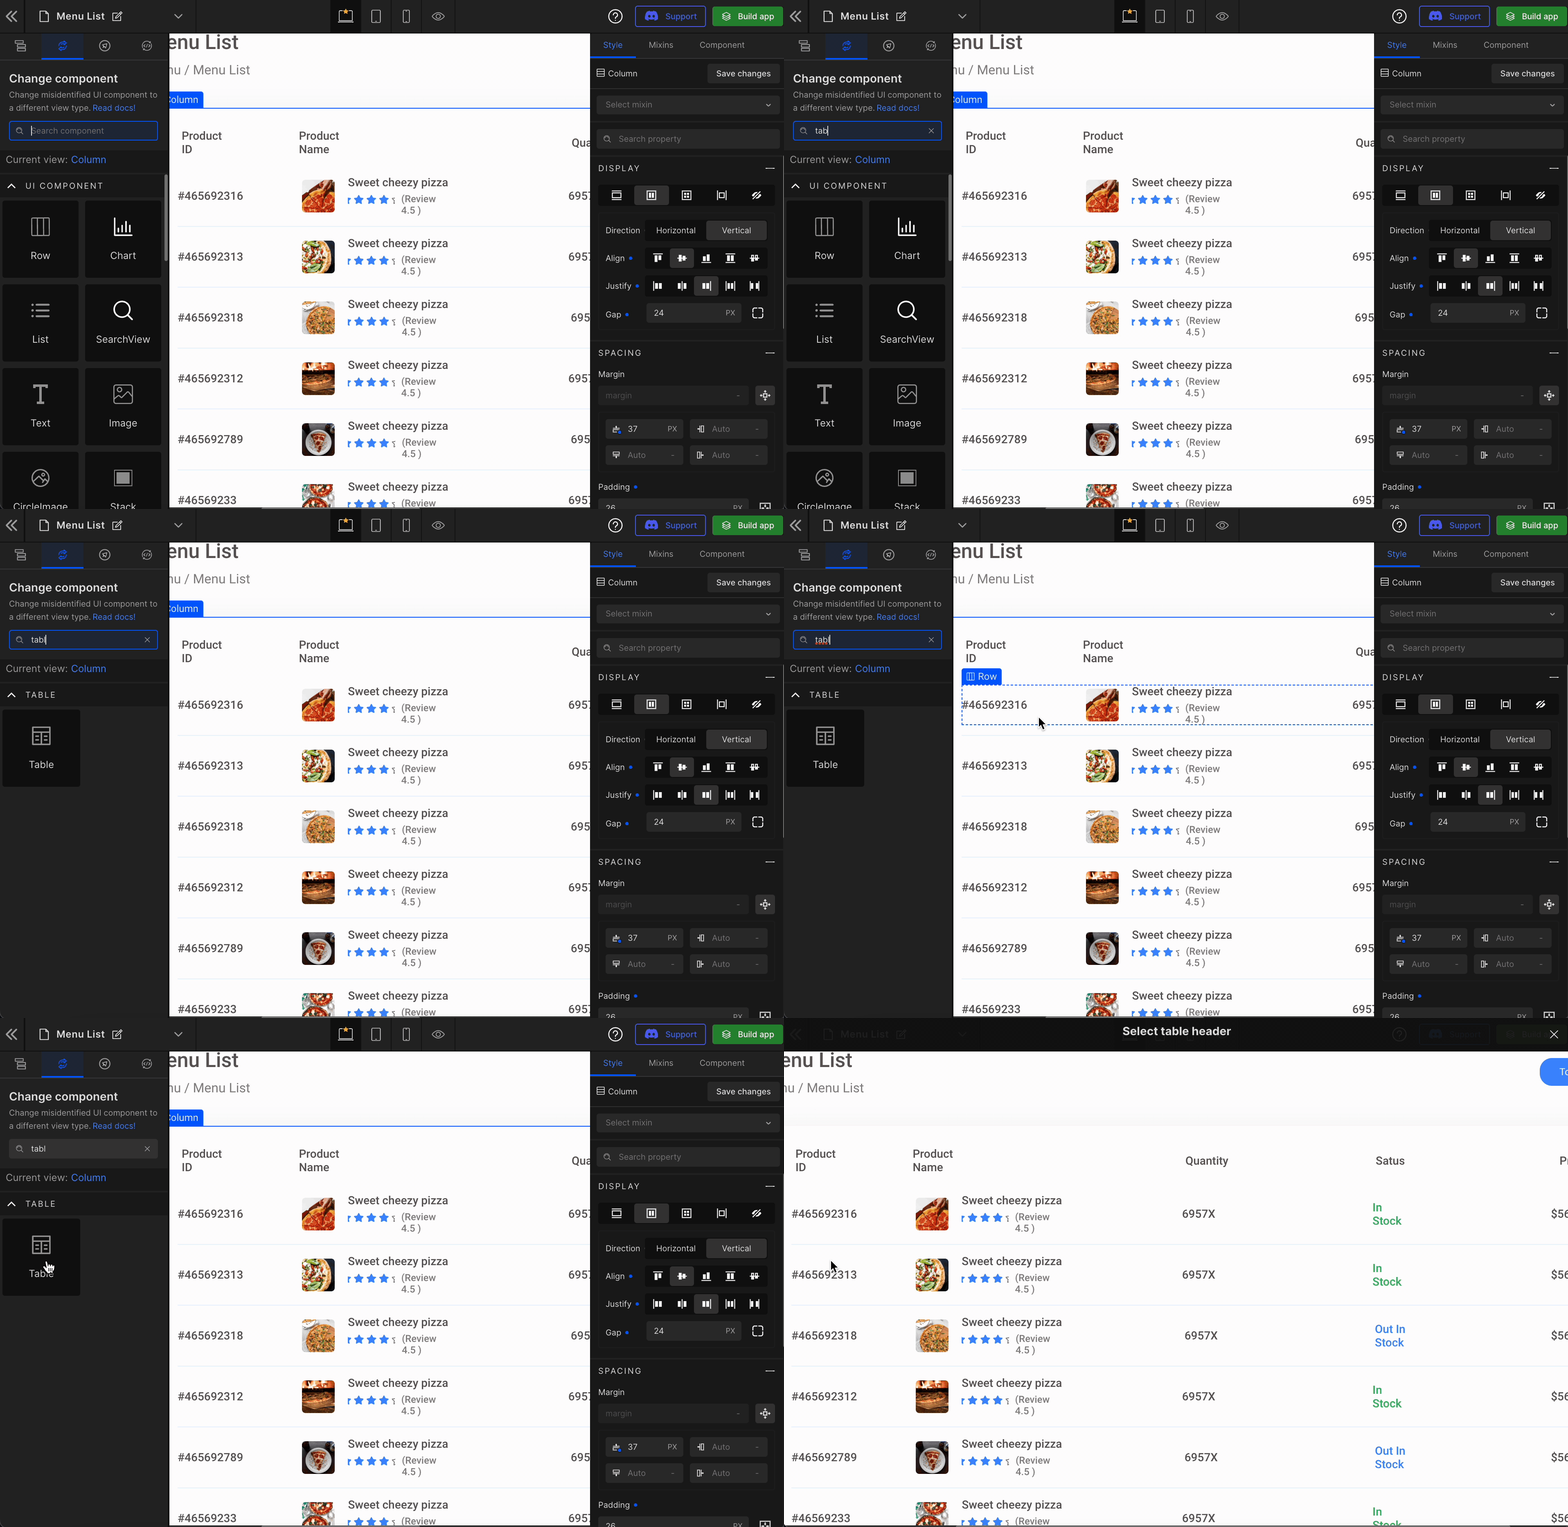
Step 2: Select the “Table” component.
Step 3: Select Table Header from the UI.
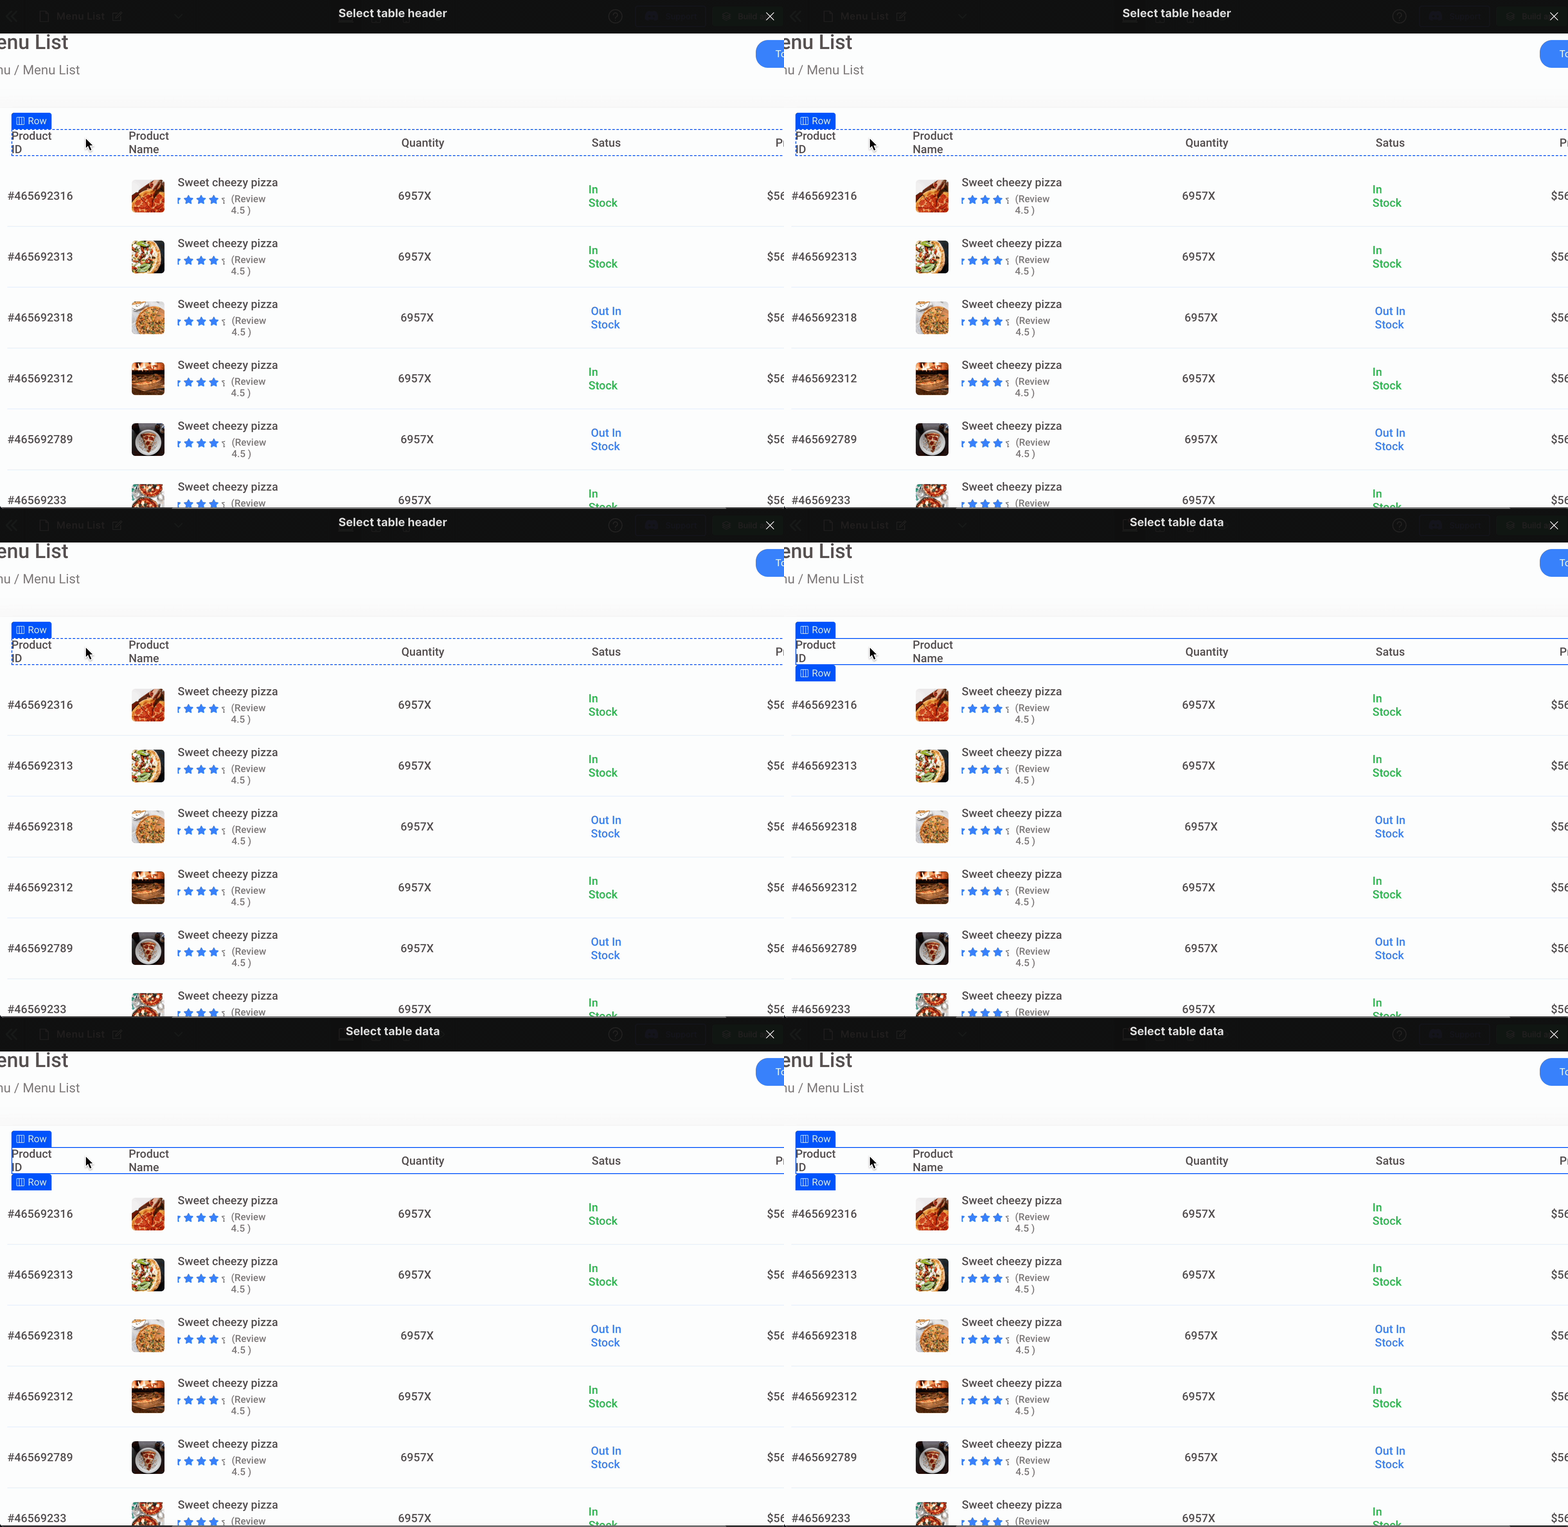
Step 4: Select Table Data from the UI.
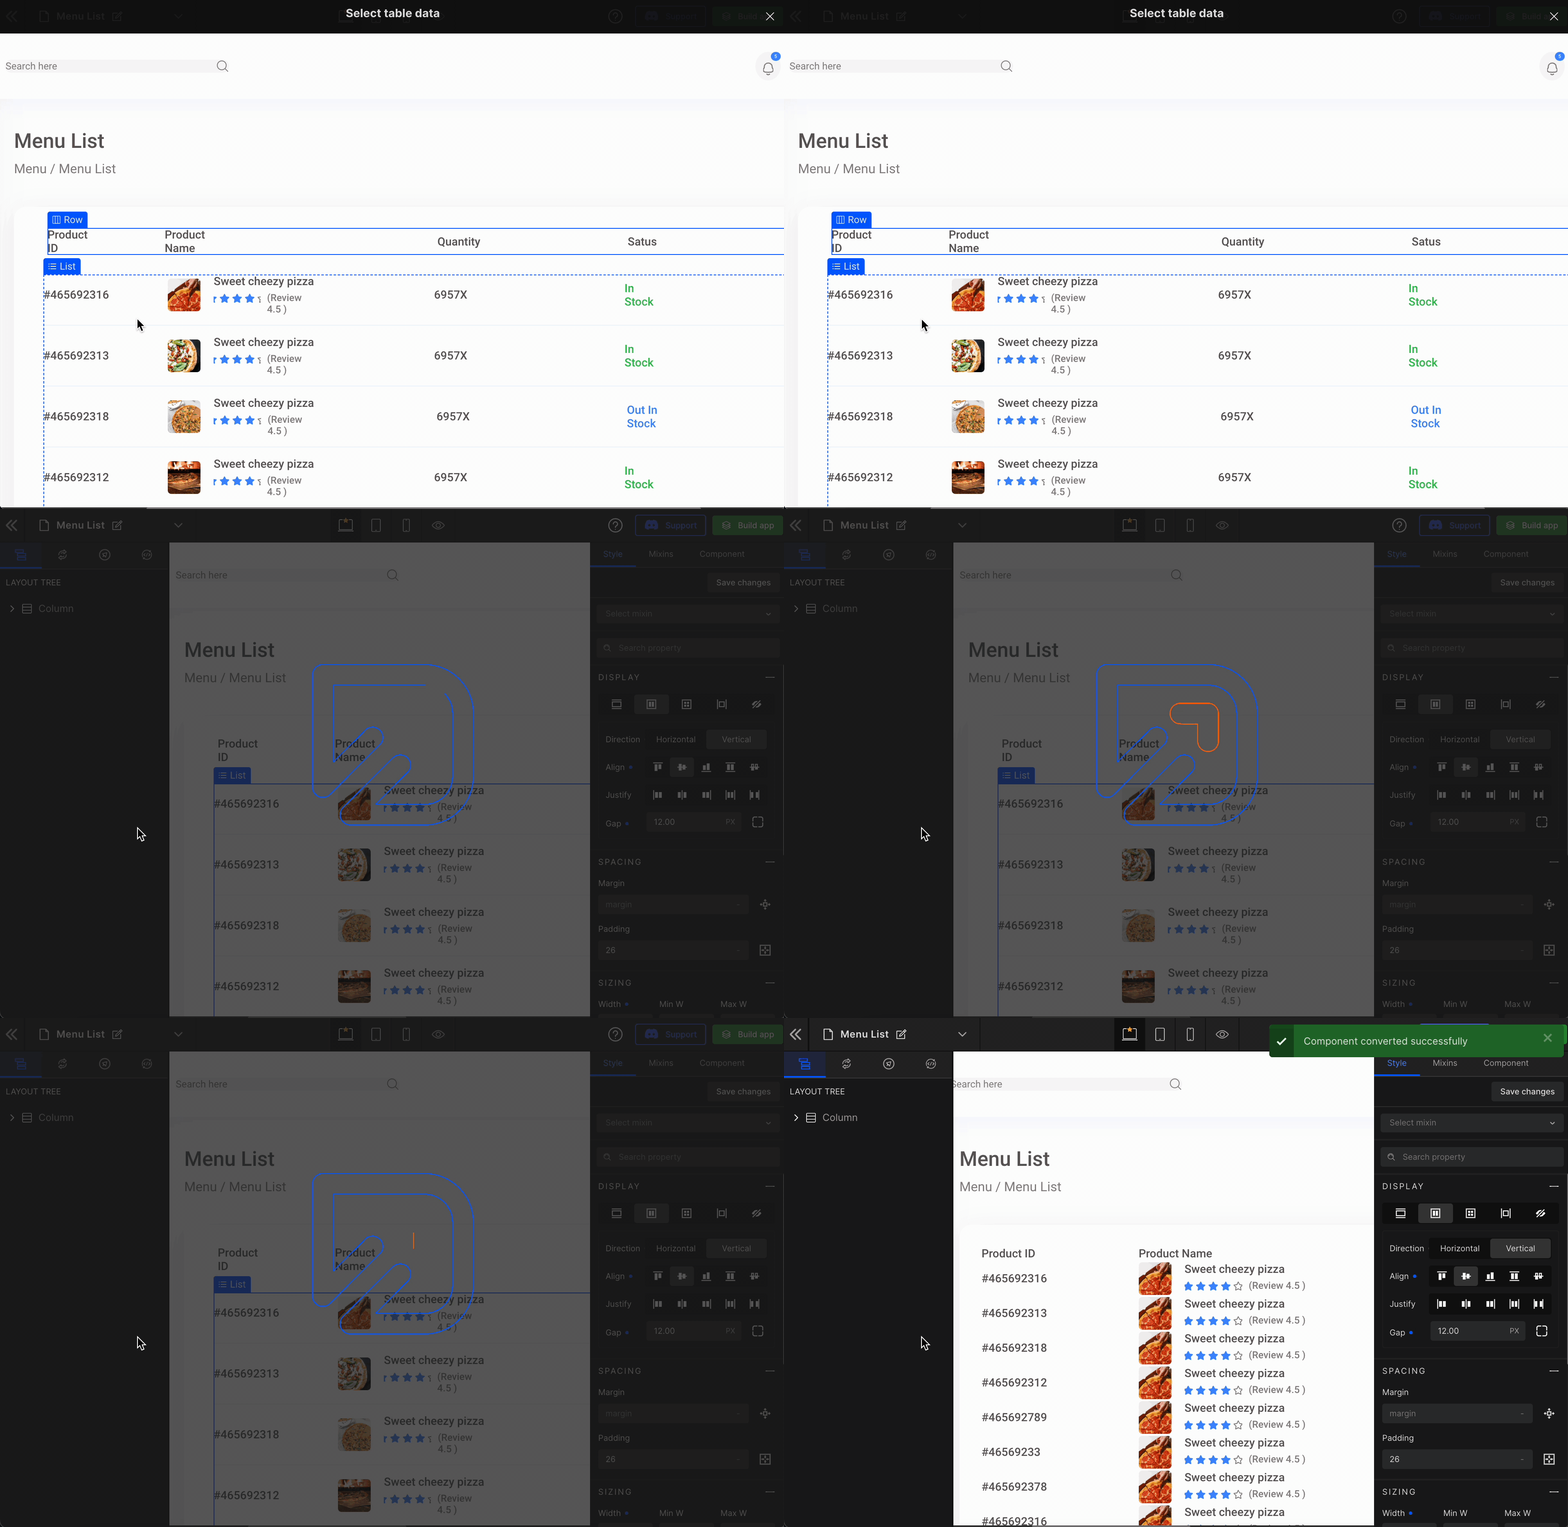
More about Table component:
DhiWise uses @tanstack/react-table (v8) for the table component. TanStack Table is a Headless UI library for building powerful tables & datagrids.
Following is the generated code for the table component.
const MenuListPage = () => {
  const tableData = React.useRef([
    {
      newGroup: "#465692316",
      newGroup1: "(Review 4.5 )",
      newGroup2: "6957X",
      newGroup3: "In Stock",
      newGroup4: "$56.12",
    },
  ]);
  const columnHelper = createColumnHelper();
  const column = [
    columnHelper.accessor("newGroup", {
      cell: (info) => (
        <Text
          className="font-medium md:mt-[0] sm:mt-[0] my-[12px] pl-[0] py-[0] text-gray_700 text-left"
          variant="body2"
        >
          {info?.getValue()}
        </Text>
      ),
      header: (info) => (
        <div className="flex flex-row min-w-[190px] md:w-[100%] sm:w-[100%] w-[18%]">
          <Text
            className="font-medium text-gray_700 text-left w-[auto]"
            variant="body2"
          >
            Product ID
          </Text>
        </div>
      ),
    }),
  ];
}
Got a question? Ask here.